How to authenticate your HTTP tunnels with inlets and OAuth.

Han Verstraete
In this tutorial you will learn how to secure your tunnelled HTTP services using the Inlets built-in HTTP authentication.
While inlets allows you to quickly expose any HTTP application to the public internet, you may not want everyone to be able to access it. Inlets can quickly add authentication to your application without any changes.
At the moment of writing Inlets support three forms of authentication:
- OAuth
- Basic authentication
- Bearer token authentication
We will be showing you how to configure each of these authentication methods.
When would you want to secure your tunnel?
If you’re exposing an application for production, you may want to build authentication directly into your application.
However, during development and whilst collaborating with others, you may want to restrict access to a limited audience.
- You’re working on a blog post draft, but only want your team mates to view it due to an embargo or because it contains confidential information.
- You’re iterating on an API, and a reverse proxy usually provides authentication. It doesn’t make sense to run that locally, but you still need to restrict access.
- When someone’s helping you with remote support. You want to expose your router’s admin interface, but need to restrict access to certain people.
- You’re running internal development tools like Grafana dashboards or staging environments that shouldn’t be publicly accessible
- You need to demo work to clients or stakeholders, but want to ensure only they can access it
- You’re exposing temporary debugging endpoints or admin interfaces that need to be secured
- You’re sharing access to local development environments like an IDE with remote team members but need to maintain security
In addition to all of the above, you can also restrict access by IP address using an IP allow list.
Prerequisites
We assume you have an Inlets HTTP tunnel server deployed. If you don’t have a tunnel yet follow our docs to create a new HTTP tunnel server.
For the tunnel client make sure you have the inlets-pro binary, version 0.10.0 or higher installed. Earlier versions do not support authentication.
Connect the tunnel client
In this example we will be exposing Prometheus, which is a popular open source tool for monitoring and alerting. We chose it because it has a web interface, and an API exposed over the same port. It does have some of its own built-in options for authentication, but when we use it with inlets, we can bypass authentication for our own local use, and only enforce it for remote users.
Expose the Prometheus upstream without any authentication enabled:
inlets-pro http client \
  --url "wss://157.180.37.179:8123" \
  --token-file "./token"  \
  --upstream prometheus.demo.welteki.dev=http://127.0.0.1:9090
Authentication for tunnels is configured through flags when connecting to the tunnel server. In the next paragraphs we will be going through the configuration for different authentication methods. The --url and --token-file flags will be left out of the commands for brevity but should be provided when connecting to your own tunnel.
OAuth with GitHub
If you want to avoid managing and distributing credentials for your application or need fine grained control over who can access the app you can use OAuth to protect tunneled applications.
In this tutorial we will be setting up OAuth with GitHub so that users can login with their GitHub account to access the tunnel.
- Follow the GitHub documentation to create a new OAuth app for your tunnel.
- Set the Authorization callback URL. In this example we are using the domain
https://prometheus.demo.welteki.devto expose the tunnel. The authorization callback for the tunnel will behttps://prometheus.demo.welteki.dev/_/oauth/callback.
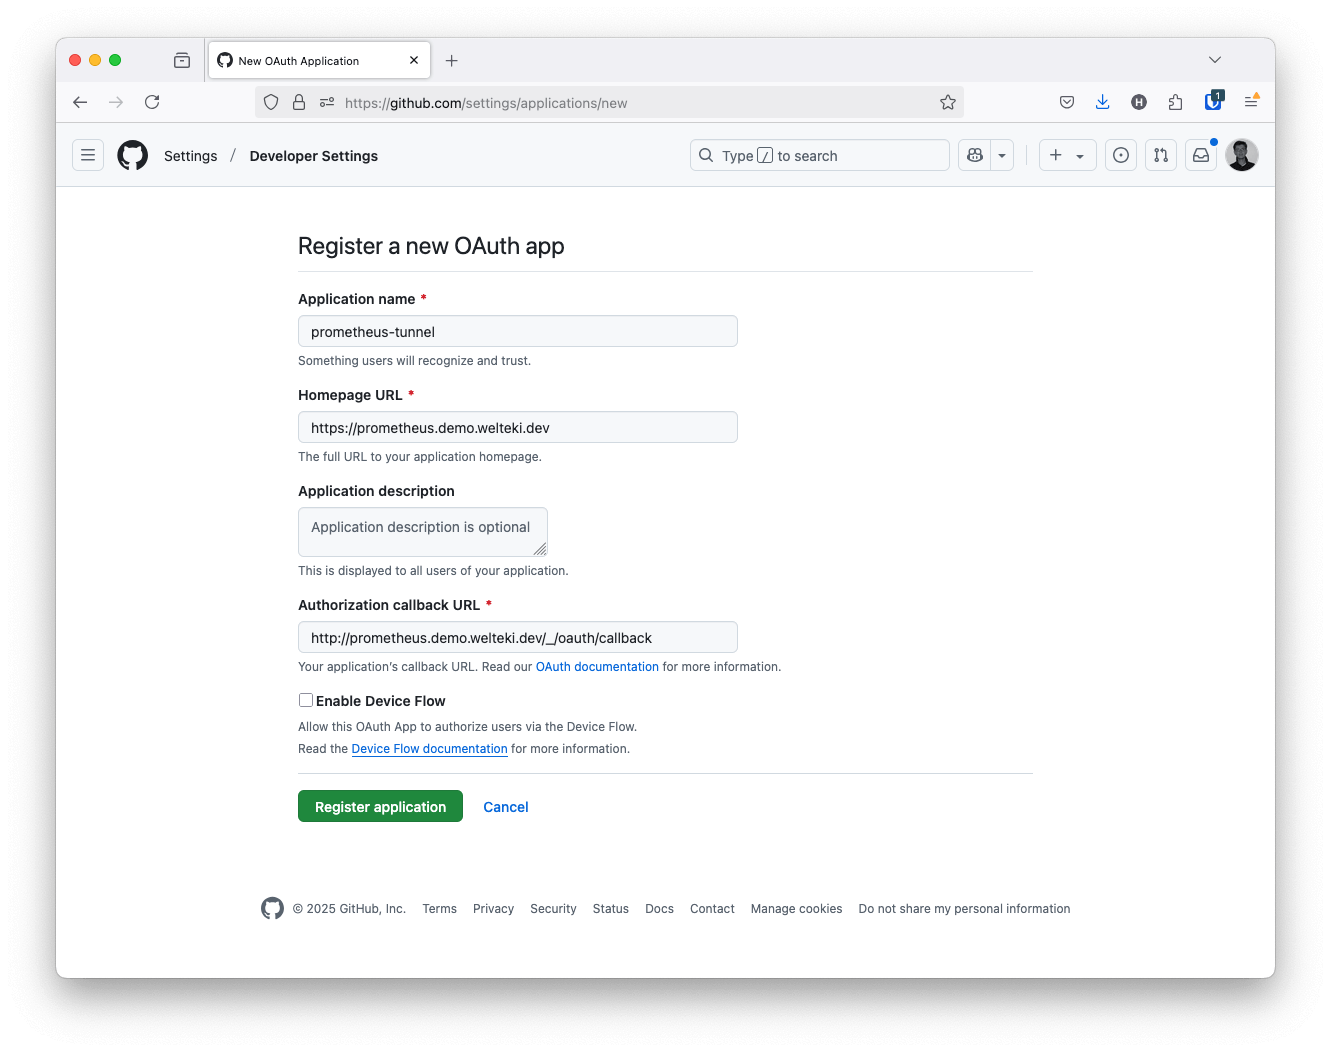
Example GitHub OAuth app configuration
Once you complete the registration of your OAuth app you will get a client id and secret. Save these in a convenient location. Both values need to be provided through the --oauth-client-id and --oauth-client-secret to start the tunnel client with OAuth enabled.
inlets-pro http client \
  --upstream prometheus.demo.welteki.dev=http://127.0.0.1:9090 \
+ --oauth-provider github \
+ --oauth-client-id $(cat ./oauth-client-id) \
+ --oauth-client-secret $(cat ./oauth-client-secret) \
+ --oauth-acl welteki
The oauth-acl flag is used to provide a list of users that are allowed to access the application. In case of the GitHub provider the ACL value can either be a GitHub username or email.
When trying to access the URl of the tunnel service, users will be asked to login with the configured provider, in this case GitHub, before they are able to access the application.
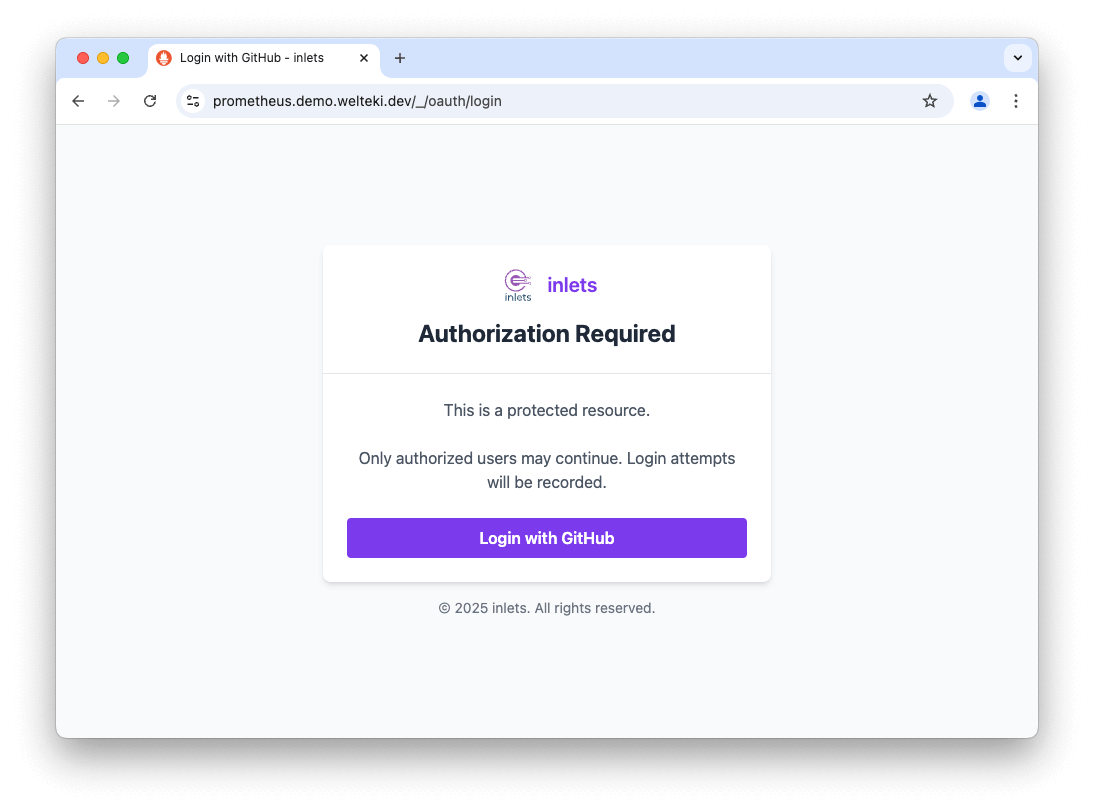
Login page for tunnels with GitHub OAuth enabled.
Basic authentication
The simplest form of authentication supported by Inlets is basic authentication. Enabling basic authentication on the tunnel will protect the HTTP service with a username and password.
When a user visits the URL of the tunneled service they will be prompted for a username and password before they are able to access the application.
Basic auth can be enabled for a tunnel by setting the basic auth flags when connecting the tunnel client.
inlets-pro http client \
  --upstream prometheus.demo.welteki.dev=http://127.0.0.1:9090 \
+ --basic-auth-username welteki \
+ --basic-auth-password $(cat ./basic-auth-password)
The --basic-auth-user flag is optional, when it is not provided the username will default to admin.
For example, the following allows access to full.name@example.com along with login1 and login2.
--oauth-acl full.name@example.com \
--oauth-acl login1 \
--oauth-acl login2
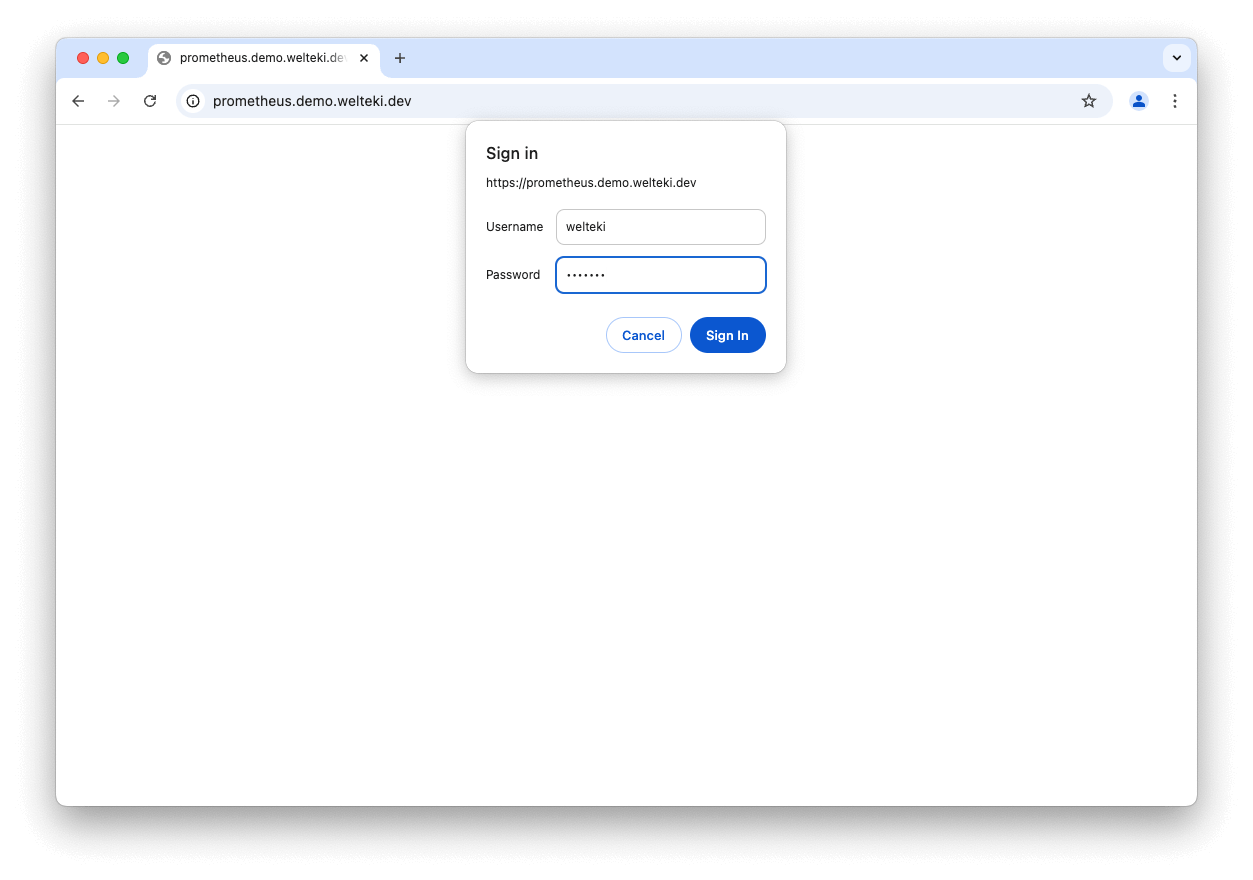
Basic auth login for a tunnel endpoint
Token authentication
The OAuth flow requires a web-browser and human interaction to authenticate. If you are tunneling a service like a HTTP API that needs to be accessed by a headless client, e.g. a script, mobile app or other non-web clients like a backend API, where it is not possible to complete the OAuth flow you can use Bearer Token Authentication.
In the case of our Prometheus server we have seen how the UI can be protected with basic auth or OAuth but the Prometheus server also exposes an HTTP API that needs to be protected but accessible by other services.
Generate a random token and store it in a file. We will use openssl to generate the token:
openssl rand -base64 16 > ./bearer-token
Start the Inlets client with the --bearer-token flag to enable token authentications.
inlets-pro http client \
  --upstream prometheus.demo.welteki.dev=http://127.0.0.1:9090 \
+ --bearer-token $(cat ./bearer-token)
Query the Prometheus API with curl and authenticate by adding the Authorization header on the request.
curl "https://prometheus.demo.welteki.dev/api/v1/labels" \
  -H "Authorization: Bearer $(cat ~/.inlets/prometheus-tunnel/token)"
The Bearer Token Authentication can be used together with both the basic auth and OAuth authentication. Just add the --bearer-token along with the flags you would need to configure AOauth or basic authentication. This makes it possible to quickly add authentication to an application like Prometheus where you have a browser based UI and HTTP API.
inlets-pro http client \
  --upstream prometheus.demo.welteki.dev=http://127.0.0.1:9090 \
  --oauth-provider github \
  --oauth-client-id $(cat ~/.inlets/prometheus-tunnel/oauth-client-id) \
  --oauth-client-secret $(cat ./oauth-client-secret) \
  --oauth-acl welteki \
+ --bearer-token $(cat ./bearer-token)
Conclusion
Inlets tunnels can be used to quickly add different types of authentication to your HTTP services without changing your applications. We showed how to configure and use the different authentication types supported by Inlets and discussed which one to pick for different use cases:
- Use OAuth if you need to expose a UI or browser based application. AOauth gives you fine grained control over who can access the tunneled service through Access Control Lists without the need to share credentials.
- Basic Authentication is the simplest form of authentication for your tunnels. It allows users to log in with a username and password and can be used as an alternative when using OAuth is not an option for you. Basic auth can also be used by headless clients without human interaction.
- Bearer Token Authentication is recommended if you are exposing an HTTP API that needs to be accessible by headless clients. It can be used as the only authentication option or in combination with both OAuth and basic authentication.
Inlets has support for multiple OAuth providers like GitHub and Google. As a commercial user you get access to all providers. Please get in touch with the Inlets team if the OAuth provider you need is missing.
Subscribe for updates and new content from OpenFaaS Ltd.
By providing your email, you agree to receive marketing emails.