Get a secure HTTPS tunnel with Let's Encrypt

Alex Ellis
Learn how to get a self-hosted HTTPS tunnel secure with Let’s Encrypt in 5-10 minutes for development, testing or self-hosting.
Introduction
In this tutorial I want to show you how quick and easy it can be to get a secure HTTPS tunnel up and running.
![]()
Let’s Encrypt offers free TLS certificates for a duration of 90 days, which can be renewed when they expire.
Tunnels are traditionally used to give you incoming network access to a service running on a private network. For application developers, many platforms require you to accept inbound webhooks, and there are very few solutions to fix this that can be used on a corporate VPN. The SaaS-based tunnels are often blocked, and have very restrictive rate limits, so get in the way of you doing your job.
When using a self-hosted tunnel, things just tend to work, and you won’t be rate-limited on the number of connections you can establish, or what DNS provider you can use.
In this post I’ll show you how to use the new Let’s Encrypt integration which ships with inlets Pro 0.8.0.
- You’ll create a small VM on public cloud with a public IP address
- You’ll run the inlets server on the VM and get a free TLS certificate from Let’s Encrypt
- Then you’ll run a HTTP server on your local network, and if you don’t have anything to hand, we provide a practical example
- You’ll then connect the client to the server and access your private service from a custom domain
Conceptual architecture: public users will be able to access a HTTP server on our local and private network over an encrypted websocket.
Start with the tunnel server
Since this tutorial was written in Feb 2021, you can automate all the below steps simply by running
inletsctl create --letsencrypt-domain tunnel.example.com, the client steps remain the same.
Since we are not relying on a third-party to host a container or VM for us with a public IP, we will create our own. It needn’t be expensive, you can generally pick the lowest price available, and sometimes even use the free-tier of your cloud provider.
Provision a virtual machine and enable SSH access.
You will need the following ports open if you’re using security groups:
- 8123 - for the websocket that runs the inlets control-plane
- 80 - to serve Let’s Encrypt HTTP01 challenges
- 443 - to serve your website or local application to users
Note down the IP address of your tunnel server and create a DNS A record in your DNS management tool
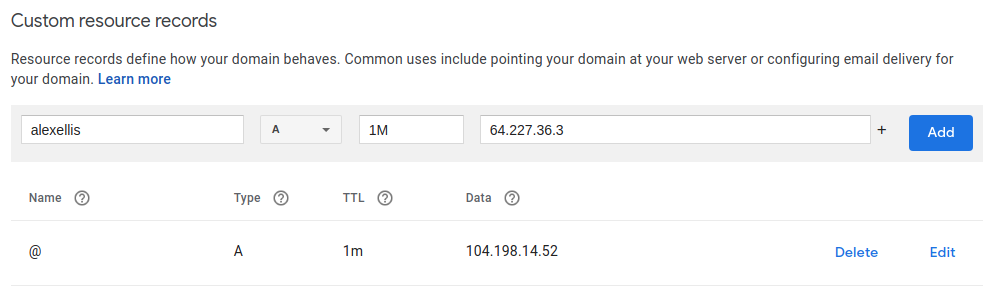
Above: Creating the alexellis.inlets.dev subdomain in Google Domains
Now download inlets onto the server using wget or curl from the releases page.
Your command will be slightly different to mine, but here’s an example you can adapt:
# Get an auth token for the inlets tunnel
export TOKEN=$(head -c 16 /dev/urandom | shasum | cut -d" " -f1)
echo $TOKEN > token.txt

# Populate from previous step
export SERVER_IP=""
export DOMAIN="alexellis.inlets.dev"

inlets-pro http server \
  --letsencrypt-domain $DOMAIN \
  --letsencrypt-issuer prod \
  --token $TOKEN \
  --auto-tls \
  --auto-tls-san $SERVER_IP
Here’s what each flag does:
--letsencrypt-domain- gets a TLS cert for each domain given, you can provide this flag multiple times--letsencrypt-issuer- use the valueprodorstagingto switch between the two options
The --token is used by the inlets client to authenticate to the server.
Then the --auto-tls flags enable TLS for the control-plane of inlets running on port 8123. This ensures that the tunnel will be able to connect, even if there is an issue with Let’s Encrypt such as rate-limiting.
You can keep the inlets server process running by generating a systemd unit file. Just run the same command as before, but add --generate=systemd
inlets-pro http server \
  --letsencrypt-domain $DOMAIN \
  --letsencrypt-issuer prod \
  --token $TOKEN \
  --auto-tls \
  --auto-tls-san $SERVER_IP \
  --generate=systemd \
  --license-file=$HOME/.inlets/LICENSE \
  > inlets-pro.service

sudo cp inlets-pro.service /etc/systemd/system

sudo systemctl enable inlets-pro
Then check it started as expected with sudo journalctl -u inlets-pro or sudo systemctl status inlets-pro. The process will now restart upon reboot, or if for some reason the process crashes.
Run a local HTTP server
I’m going to run a HTTP server using Node.js on port 8080. I want to share it with my friends, but I also want to get some webhooks from a third-party like GitHub and this tunnel will help me with building the functionality and testing it.
git clone https://github.com/alexellis/expressjs-k8s
cd expressjs-k8s
npm install

npm start

Express.js listening on port: 8080
If you don’t want to install Node.js on your computer, you can also use the README to run the process using Docker.
If you don’t know what to expose, try inlets’ own HTTP fileserver extension, set it up: here
This local HTTP server will be called the “upstream”, it’s where the inlets-client will direct traffic. It doesn’t have to be on the same computer as the client, it could be running on your Raspberry Pi, or your NAS for instance.
If running on your own computer, the upstream may be: http://127.0.0.1:8080, and when running on a NAS, the upstream may be: http://192.168.0.101:8080 for instance.
Start the client
For Linux:
curl -SLsf https://github.com/inlets/inlets-pro/releases/download/0.8.1/inlets-pro > inlets-pro
chmod +x ./inlets-pro
For Raspberry Pi, add the suffix -armhf to the download URL.
For MacOS:
curl -SLsf https://github.com/inlets/inlets-pro/releases/download/0.8.1/inlets-pro-darwin > inlets-pro
chmod +x ./inlets-pro
For Windows, see the Releases page.
Now connect your inlets client to the inlets server:
# Populate from server
export SERVER_IP=""
export TOKEN=""

# Populate from previous step
export UPSTREAM="http://127.0.0.1:8080"

# Save your inlets-pro license to ~/.inlets/LICENSE

inlets-pro http client \
  --url wss://$SERVER_IP:8123 \
  --token $TOKEN \
  --upstream $UPSTREAM \
  --license-file $HOME/.inlets/LICENSE
The four things you need to do are:
- Set the
SERVER_IP - Set the
TOKEN - Set the
UPSTREAMi.e.”http://127.0.0.1:8080” - Save your license to
~/.inlets/LICENSE
Test out your tunnel
Within a few moments you’ll have a tunnel established, and the inlets server will provision a certificate for your domain using Let’s Encrypt.
Visit your domain such as https://alexellis.inlets.dev/
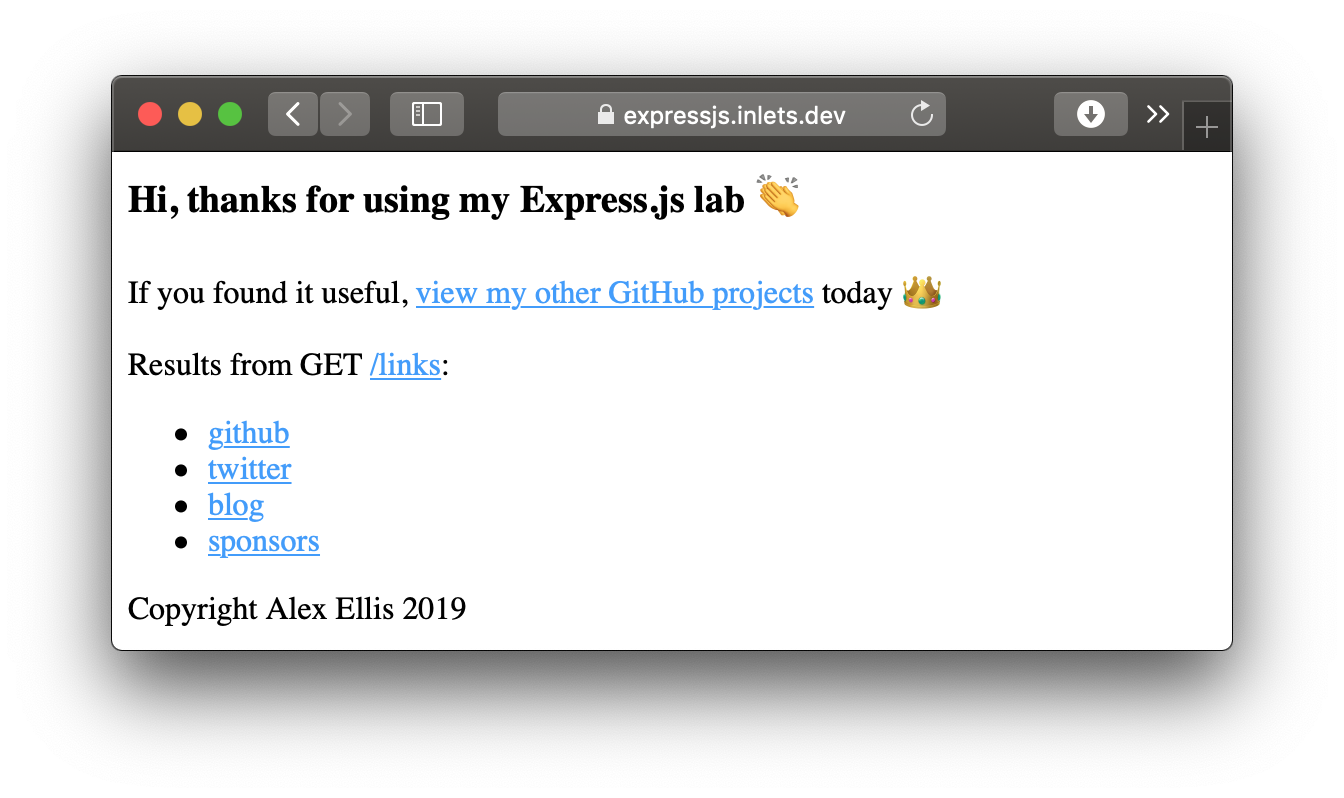
Here an Express.js tunnel that I set up a few weeks prior to this tutorial.
There was a small challenge I ran on Twitter, where eight different community users set up their own HTTPS tunnels using these instructions.
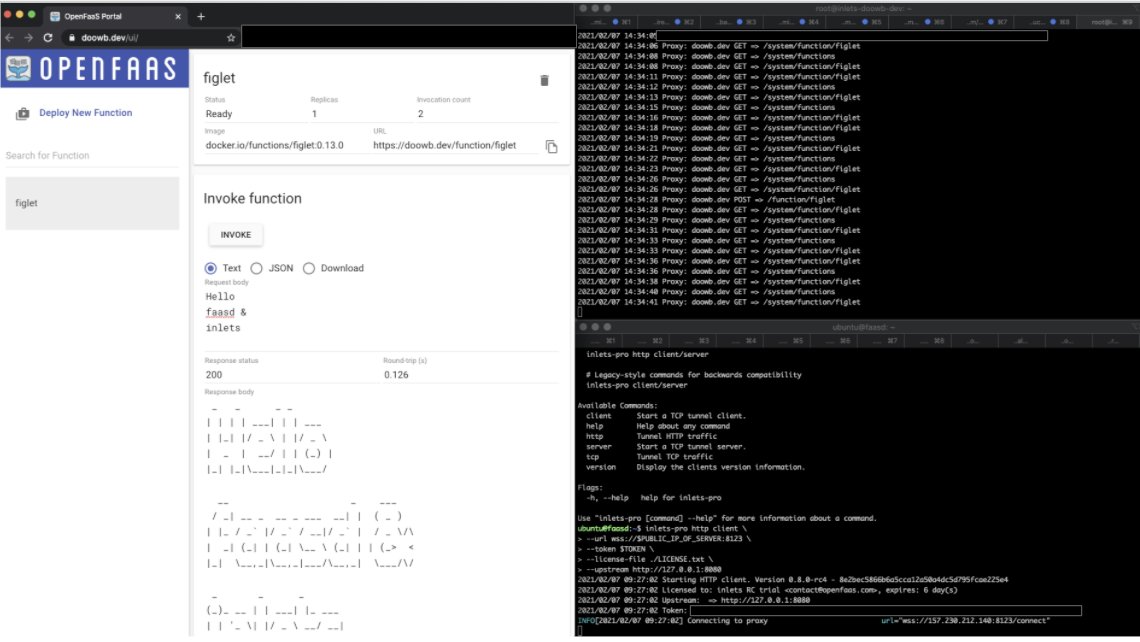
Matti Ranta from the Gitea project prepares for his live stream on OpenFaaS, by getting webhooks from Gitea to his functions
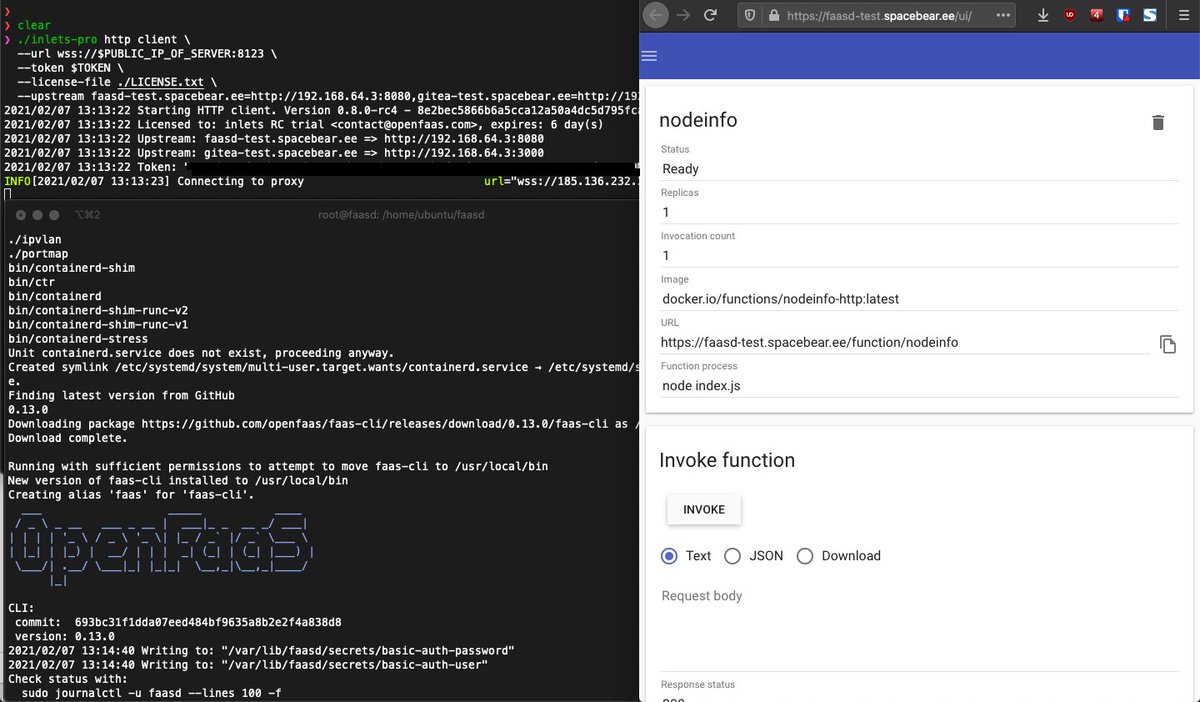
faasd exposed for receiving webhooks
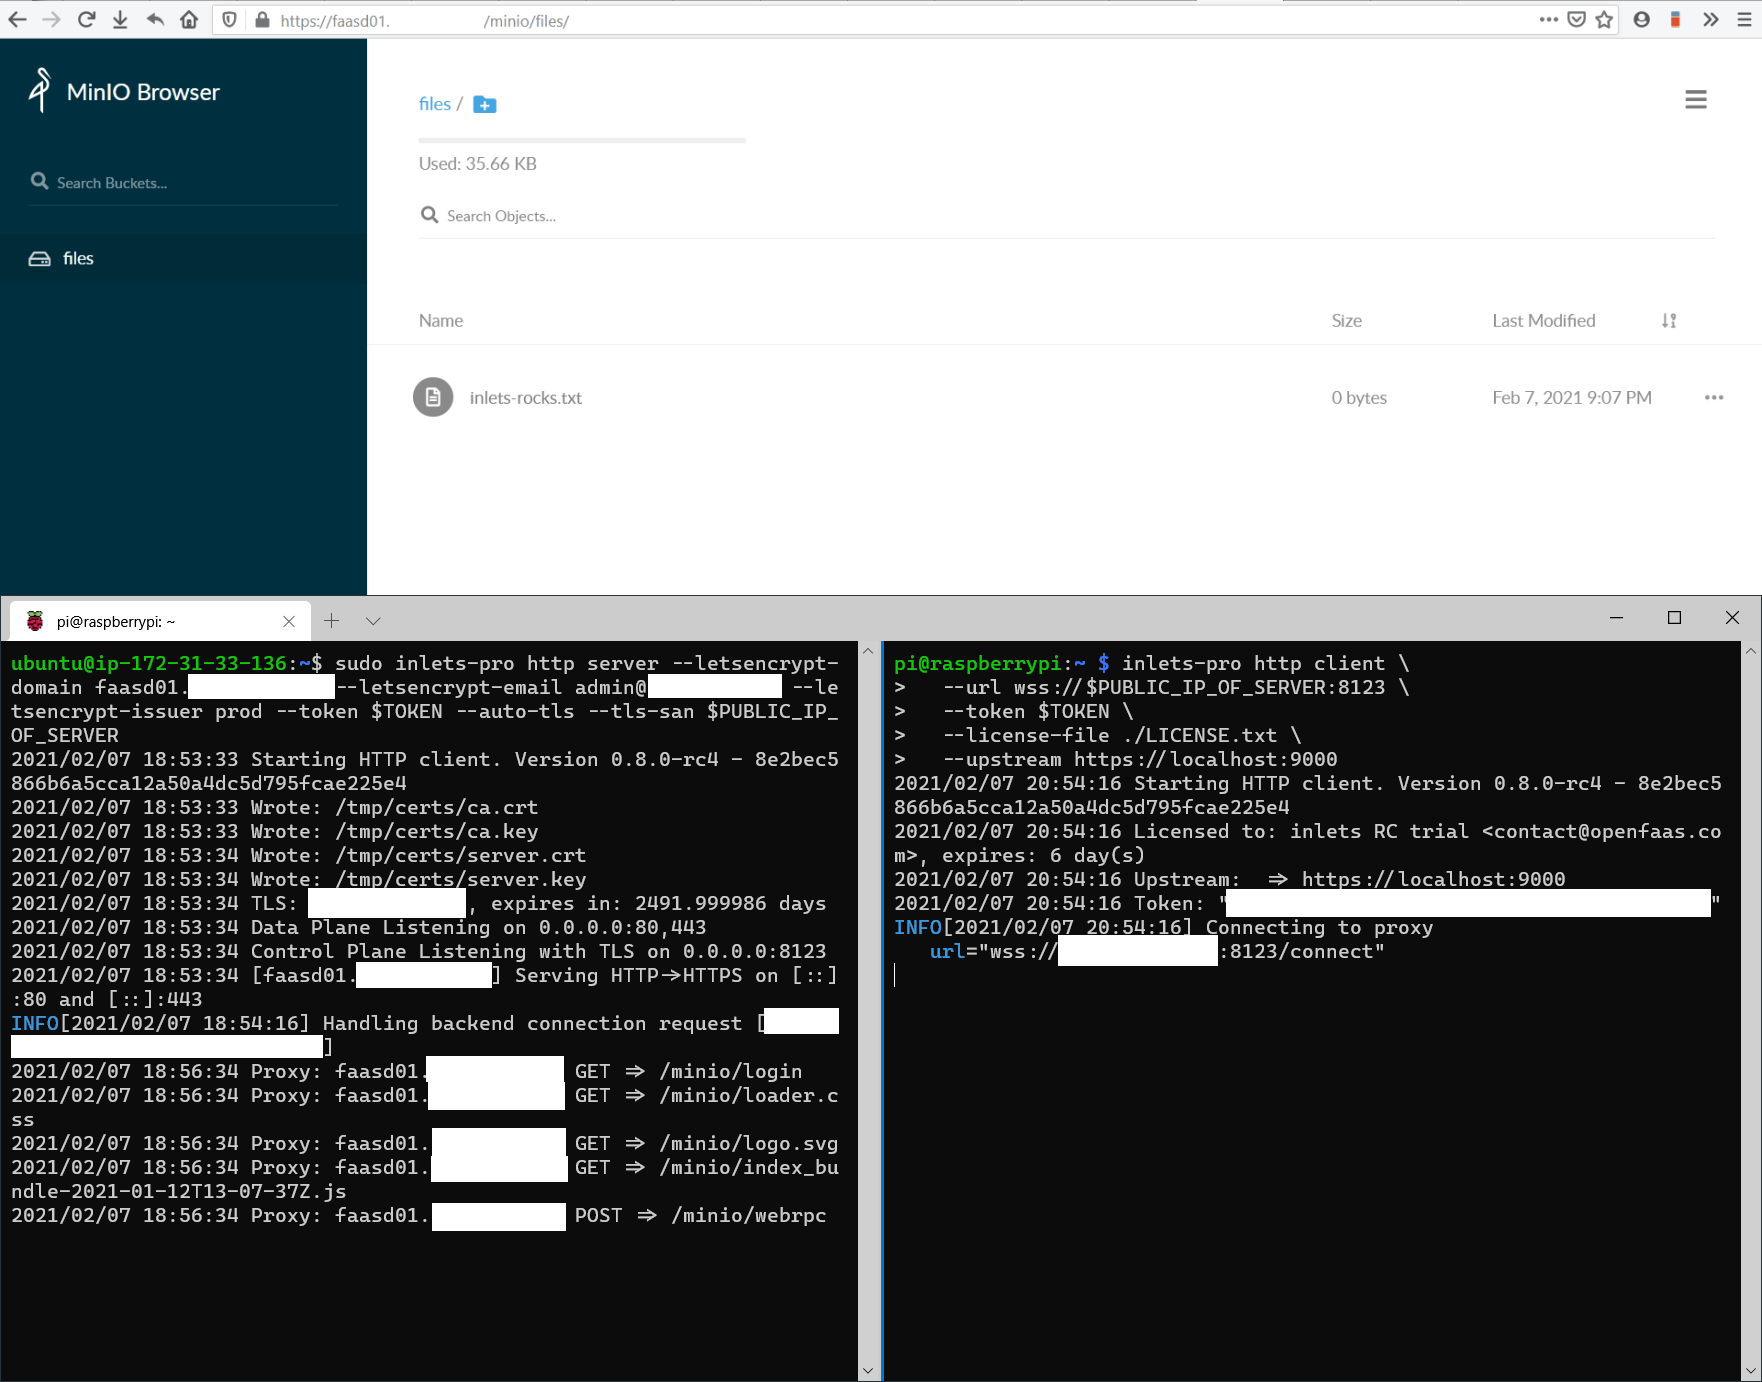
slava exposed Minio, so that he could get secure access to self-hosted S3
Brian Woodward exposed his OpenFaaS cluster running on K3s
What next?
Now that you have a tunnel server, you can keep it running at a very minimal cost and reconnect to it whenever you need.
You can connect several inlets clients to your tunnel server, either for redundancy (connections will be load-balanced), or for separate sites.
If you’re an OpenFaaS user, then you may setup two separate subdomains for Grafana and the OpenFaaS UI.
grafana.example.com- upstreamhttp://127.0.0.1:3000faas.example.com- upstreamhttp://127.0.0.1:8080
Then it’s up to you whether you want to connect one client or two.
inlets also supports tunnelling TCP traffic and can be used with Kubernetes as a LoadBalancer through the inlets-operator project.
Wrapping up
We’ve now set up a self-hosted tunnel server and can use it whenever we like. inlets also supports TCP tunnels for services like RDP, VNC, SSH and databases. I’ve included a few more blog posts to help you understand use-cases.
What did you expose? Tweet to @inletsdev and we’ll give the first 5 people 10% off a personal license.
Did you know that the personal license can now be used at work? inlets Pro has two options for licensing - either a personal license or a commercial license. You can learn more on the pricing page.
Use-cases:
- Expose your local OpenFaaS functions to the Internet with inlets
- How to integrate with GitHub the right way with GitHub Apps
- Save Money by Connecting Your Local Database to the Public Cloud
Further resources:
Subscribe for updates and new content from OpenFaaS Ltd.
By providing your email, you agree to receive marketing emails.