Managed HTTPS tunnels in one-click with inlets cloud

Alex Ellis
Imagine if you could expose a local HTTP service, without TLS enabled to the public Internet with a HTTPS certificate with just one click.
This is now possible with inlets cloud, our hosted tunnel service which is live in Europe, US East and Asia, and free to use for all inlets subscribers whilst in beta.
We’ll start off by looking at the one-click, automatic option, then look at how we can use our own custom domain or even a custom Reverse proxy like Caddy, Nginx, or Traefik. I’ll also throw in some bonus material on how to expose SSH, the Kubernetes API, and an advanced option for self-hosting your own tunnel server.
For help and support, you can join our Discord server from the link in the inlets cloud dashboard, or use the contact page to get in touch.
Three options for your tunnels
We’ll focus on HTTP traffic for this post - think of a draft blog post, an API you’re working on, a webhook receiver, something in your homelab like Grafana, Wordpress, or perhaps an S3 endpoint like Minio that you can use to perform backups over the Internet to your NAS.
Let’s look at each of the three options rated from the 1-click experience (easiest) all the way down to running your own Nginx server, Caddy server, or Kubernetes Ingress controller (most flexible).
1. One-click HTTP to HTTPS - with our try-inlets.dev domain
You have a HTTP endpoint on your machine, with no TLS enabled. You can now expose it to the public Internet with a single click using HTTPS, under our domain try-inlets.dev
Create a tunnel giving it a descriptive name like “Wordpress”, “Next”, or “Grafana”, etc.
Click the “HTTP endpoint (we will terminate TLS for you)” option.
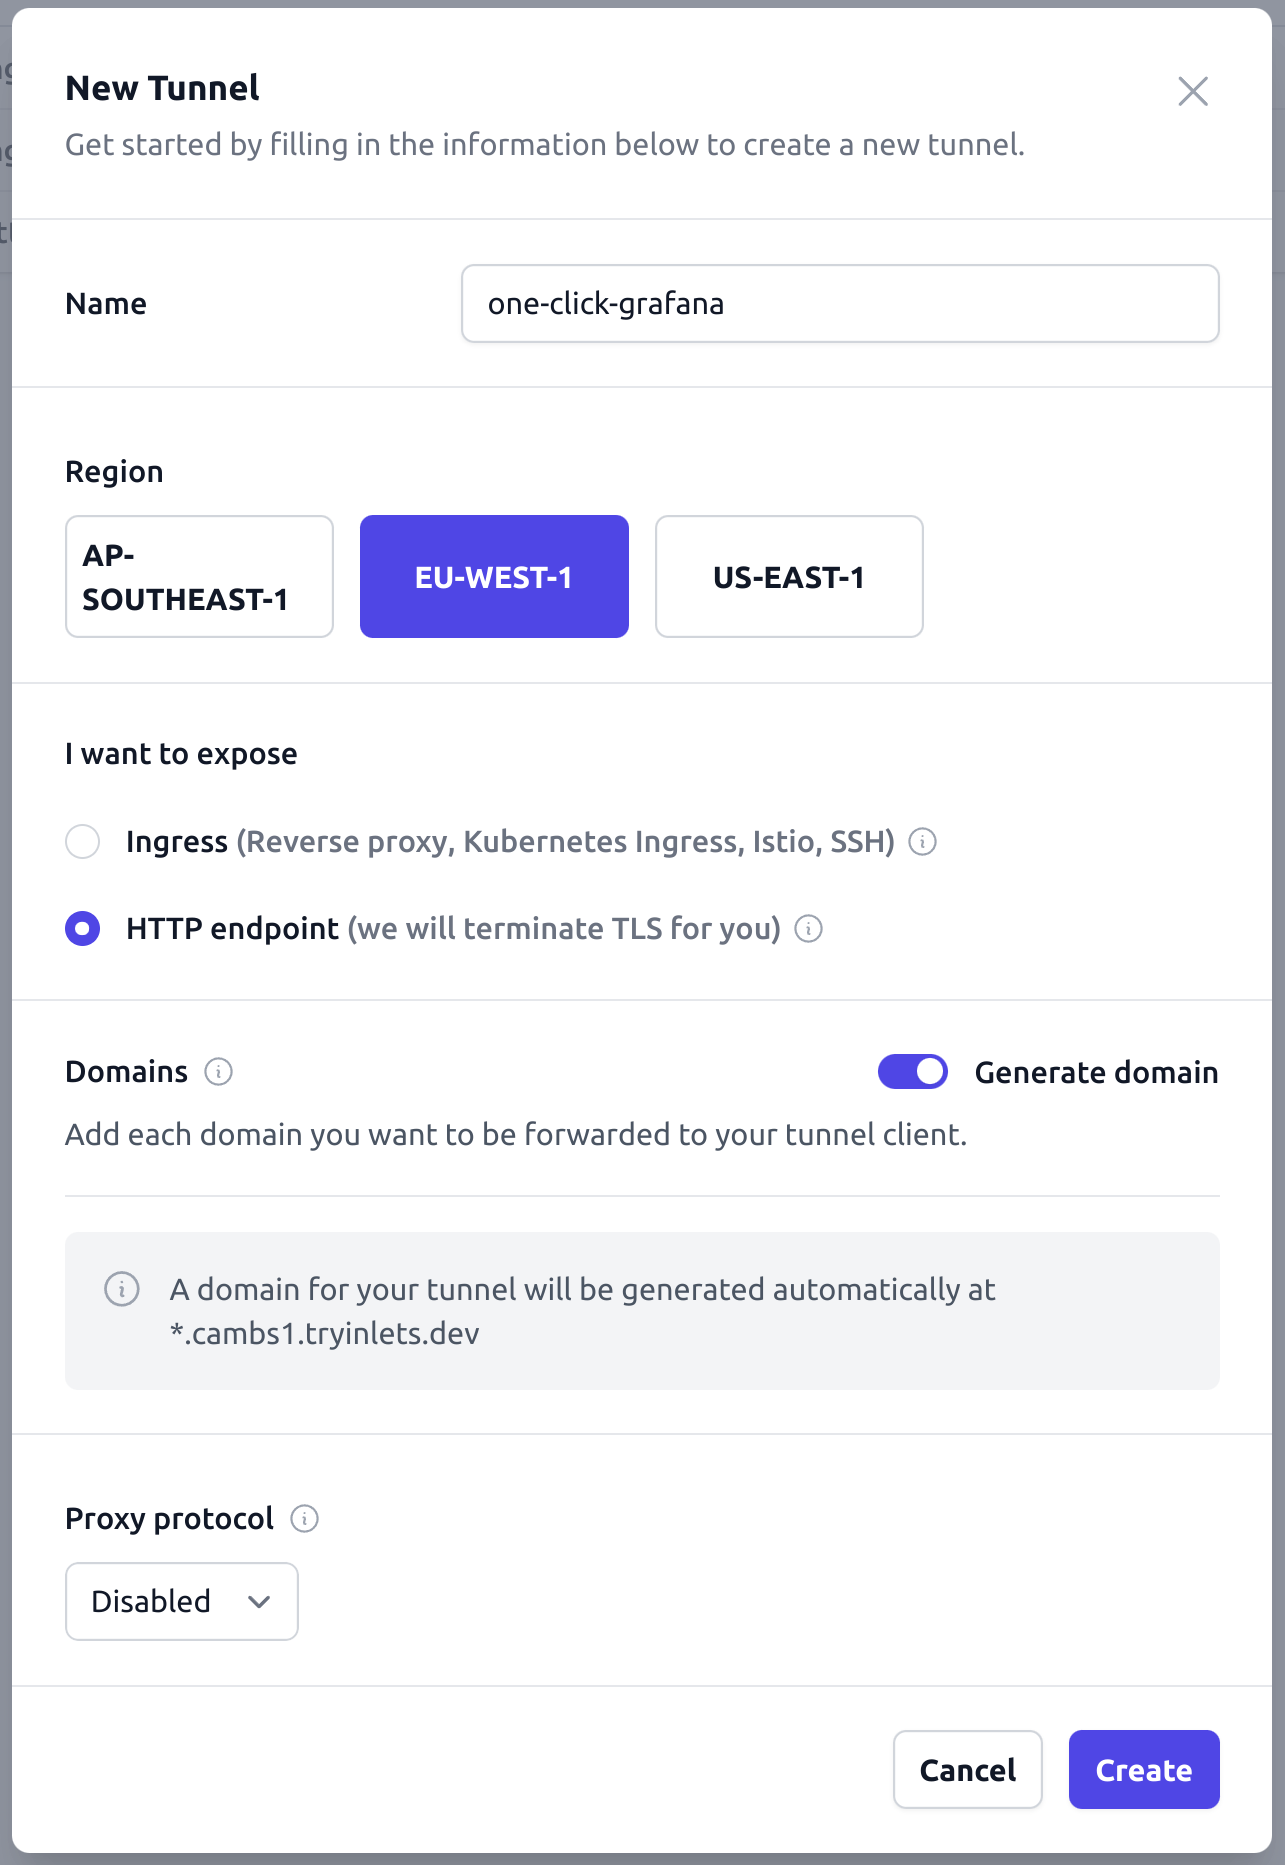
Then make sure the “Generate domain” is toggled on, this will generate a random and fun domain name for you like prickly-hedgehog.try-inlets.dev or happy-platypus.try-inlets.dev.
Create the tunnel, then scroll down to “Connect” and pick from CLI, systemd or Kubernetes YAML
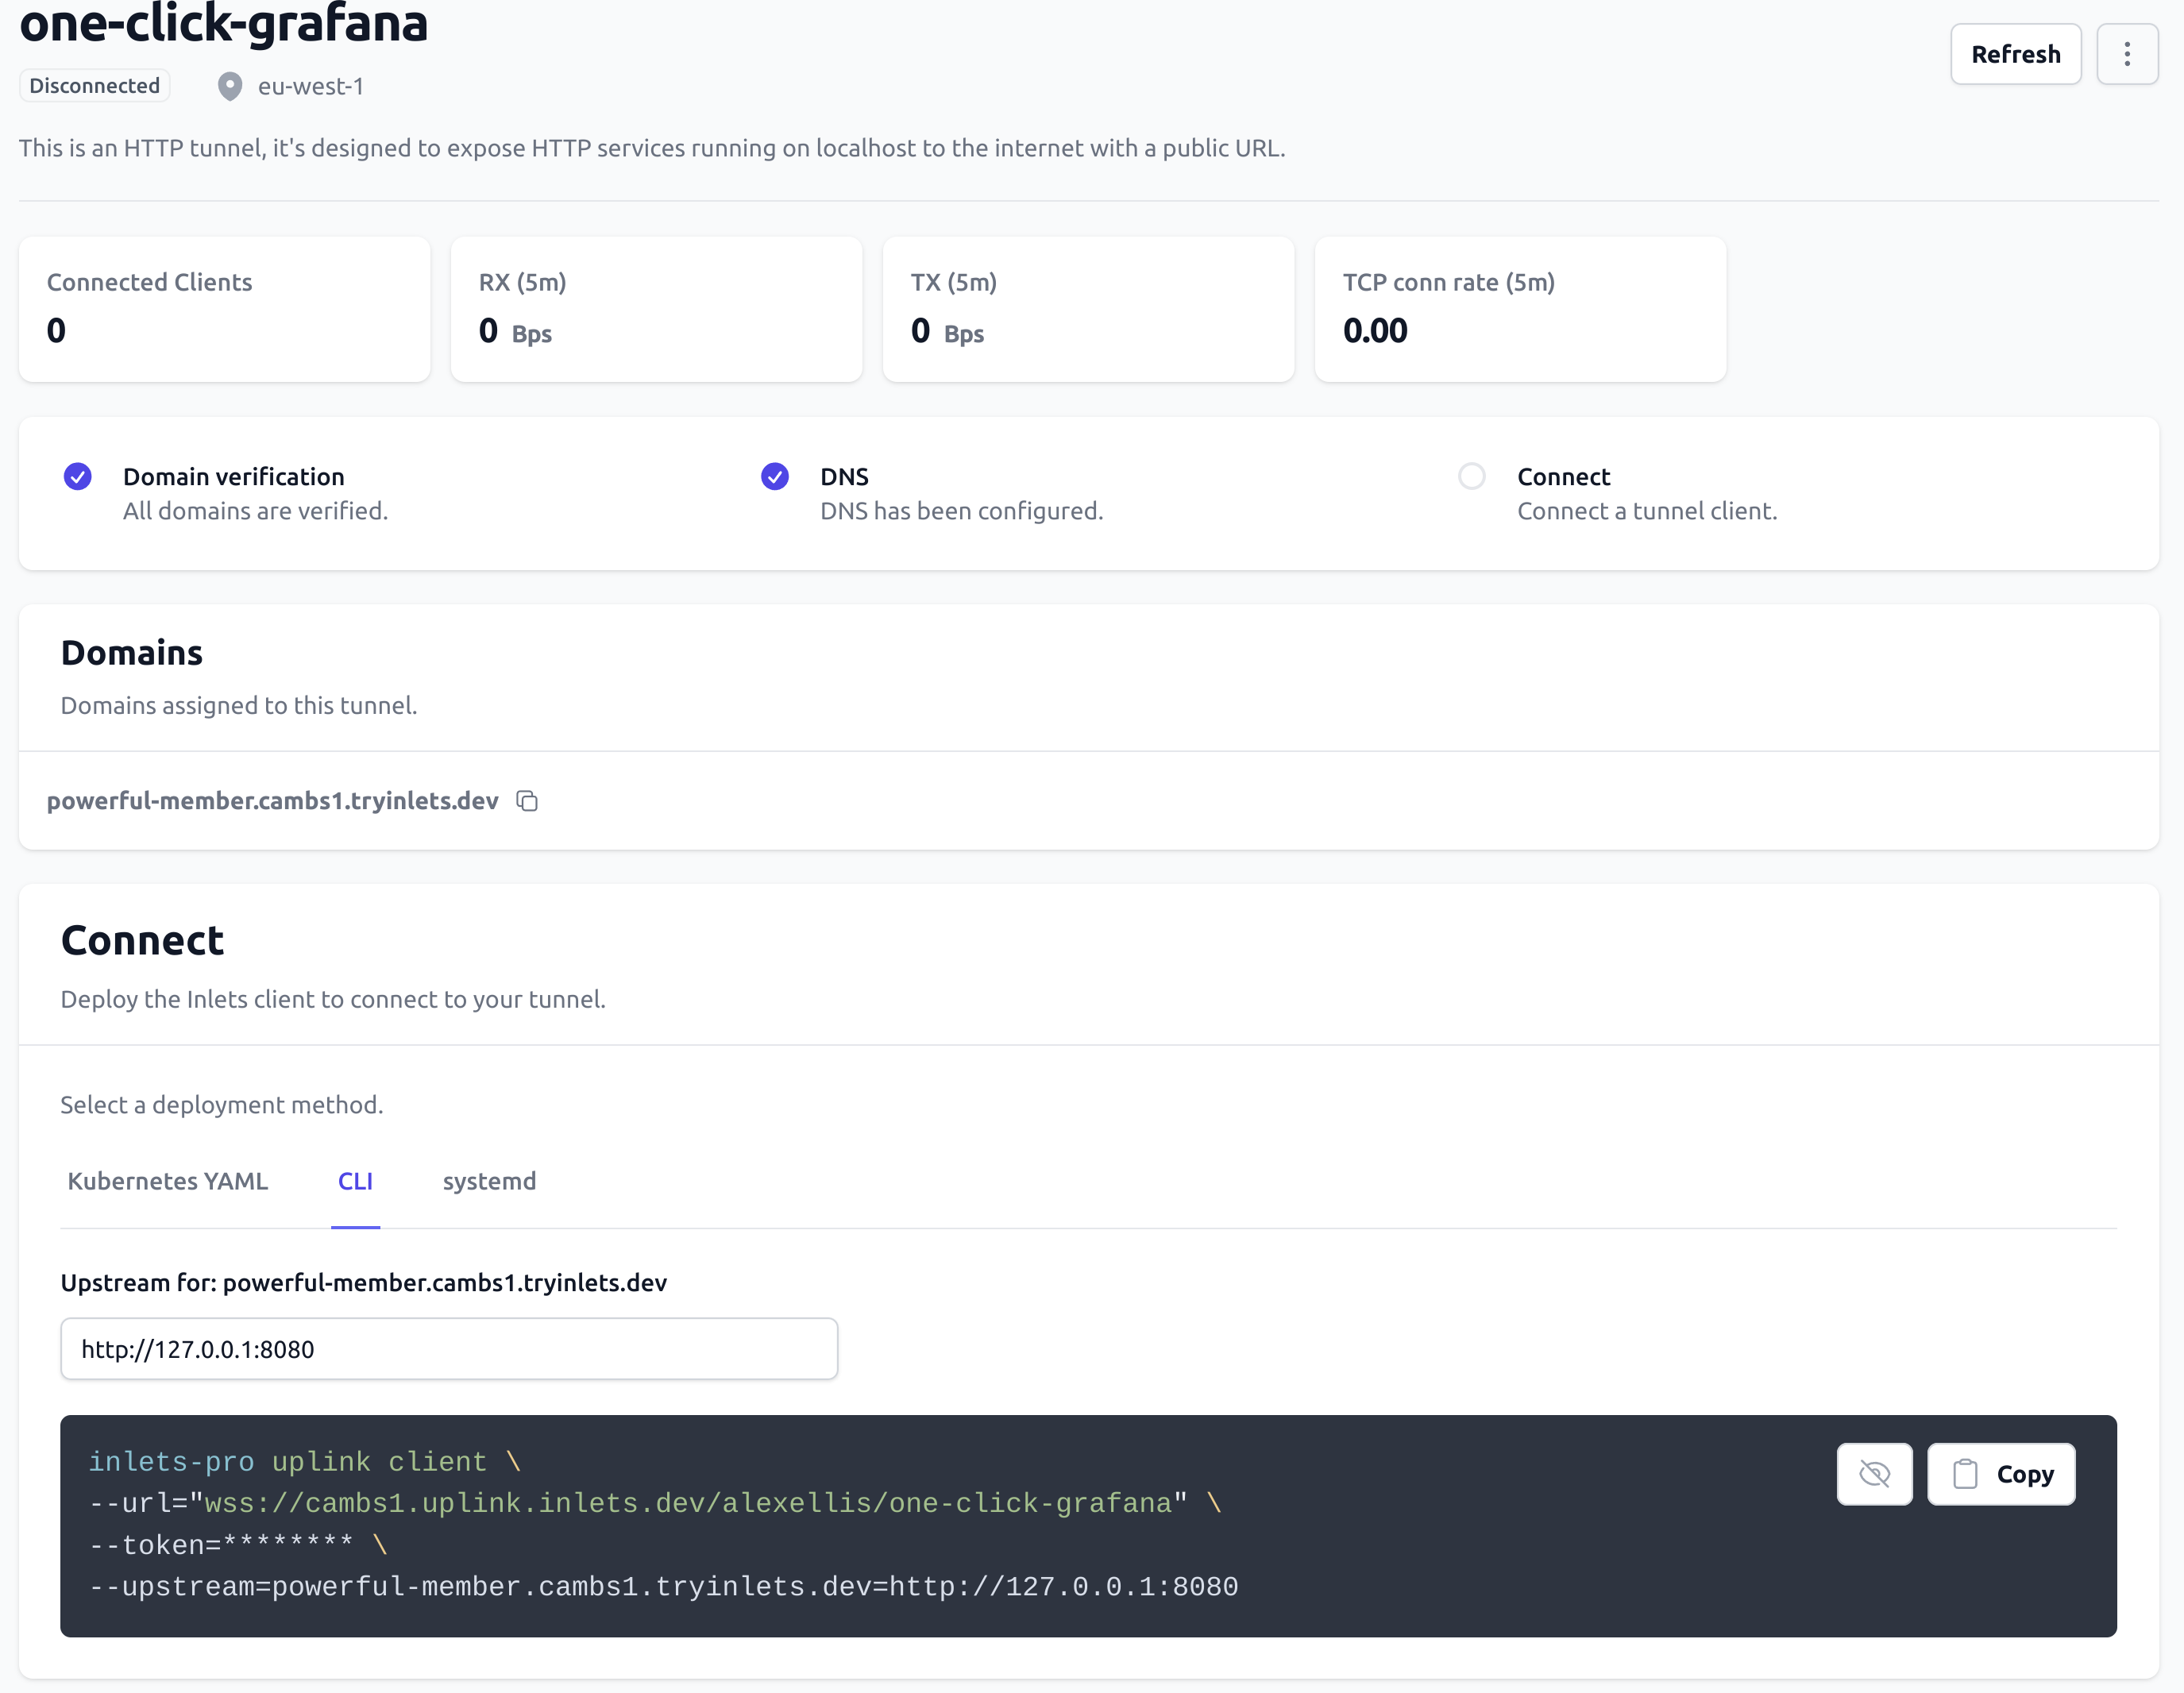
Click the Copy icon and then paste the CLI command in on your local machine.
Change the --upstream flag to the HTTP endpoint on your local machine, or on a machine reachable on your local network.
For Grafana, that is likely going to be: http://127.0.0.1:3000, but if that were on your Raspberry Pi, it could be: http://192.168.0.12:3000
You’ll then be able to access your service at https://prickly-hedgehog.try-inlets.dev or whatever name you chose.
I recorded a quick video walk-through to show you just how quick and easy this approach can be:
2. HTTP to HTTPS with your own custom domain
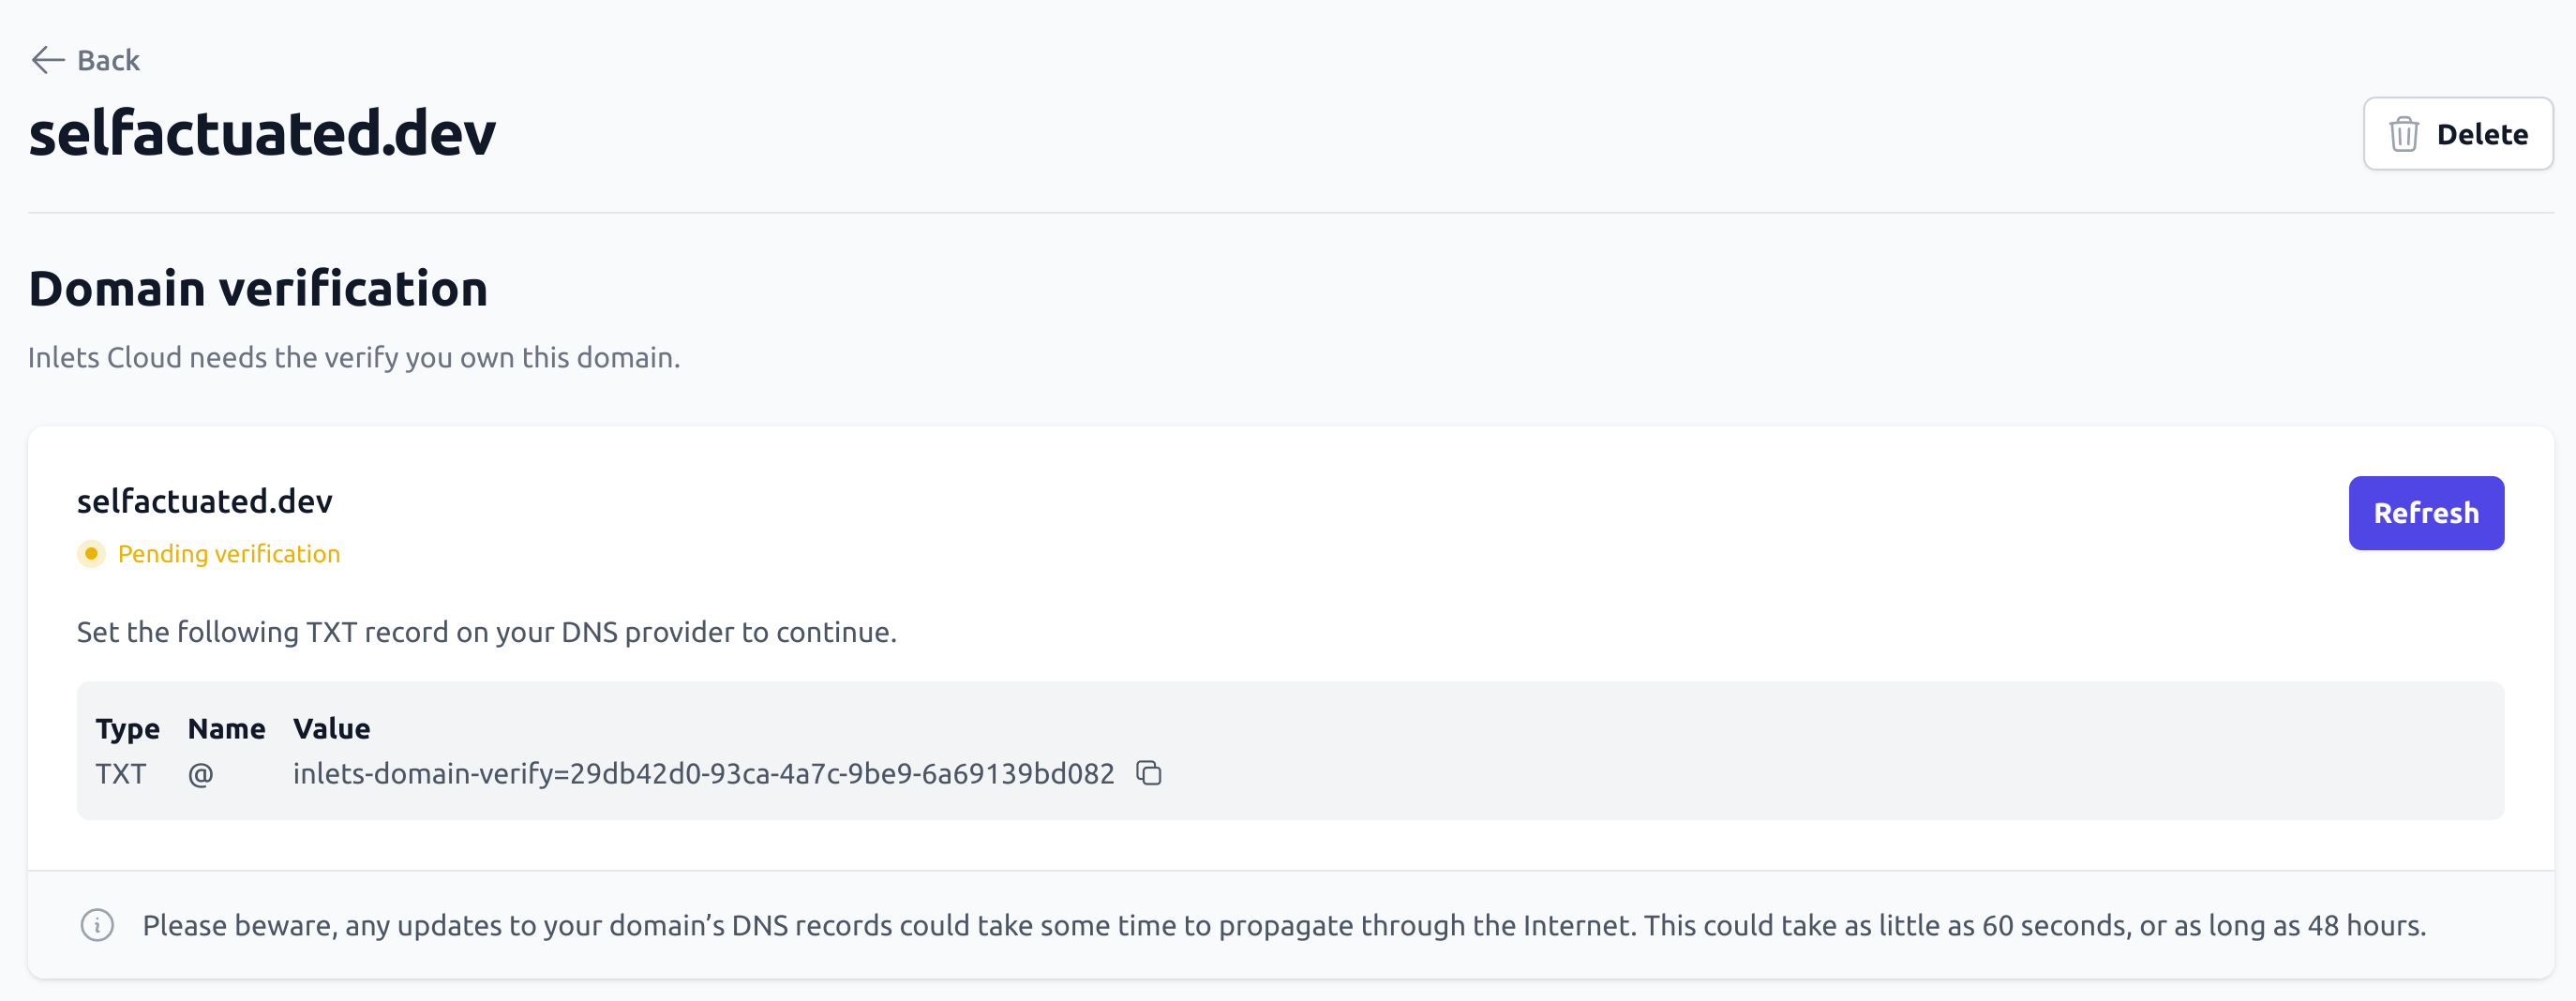
First of all, create a new domain and verify it by creating a TXT record in your DNS provider. If you don’t have a domain yet, we’d recommend trying out Cloudflare or Namecheap, both of which are easy to set up and have a free tier.
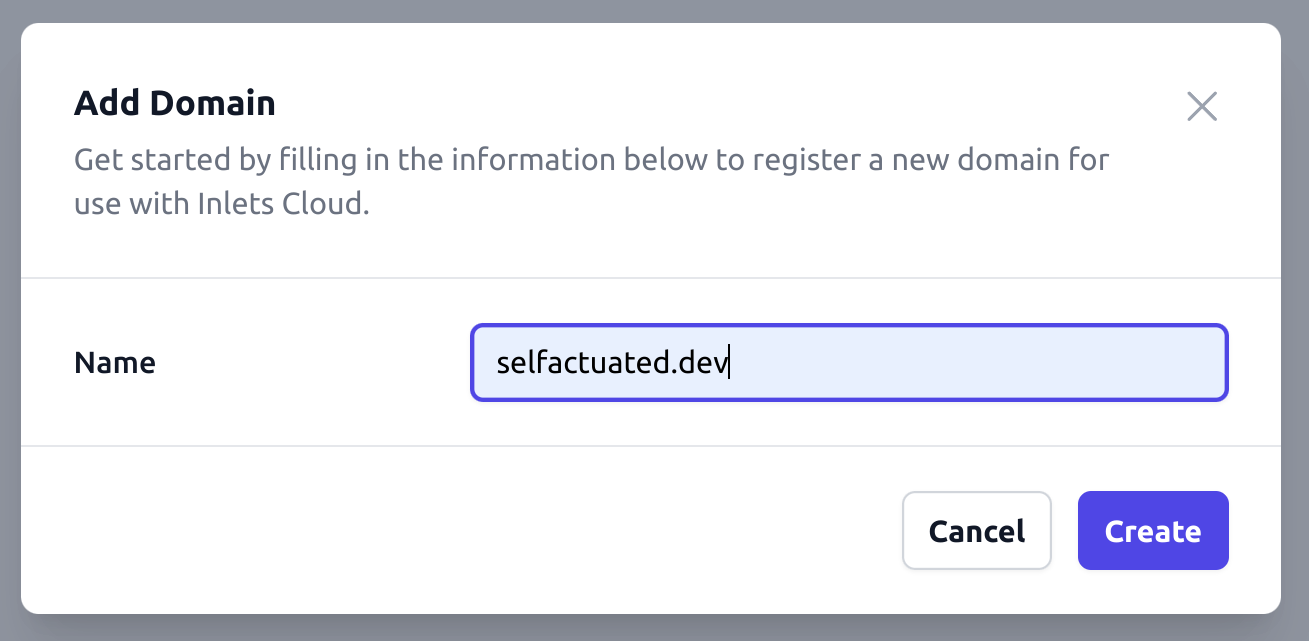
The UI will show you how to verify your own domain, and confirm that it is working.
Next, create a tunnel again, but this time make sure the toggle for “Generate name” is off.
Enter each of the sub-domains you’d like to use, and then again scroll down to “Connect” and pick from CLI, systemd or Kubernetes YAML
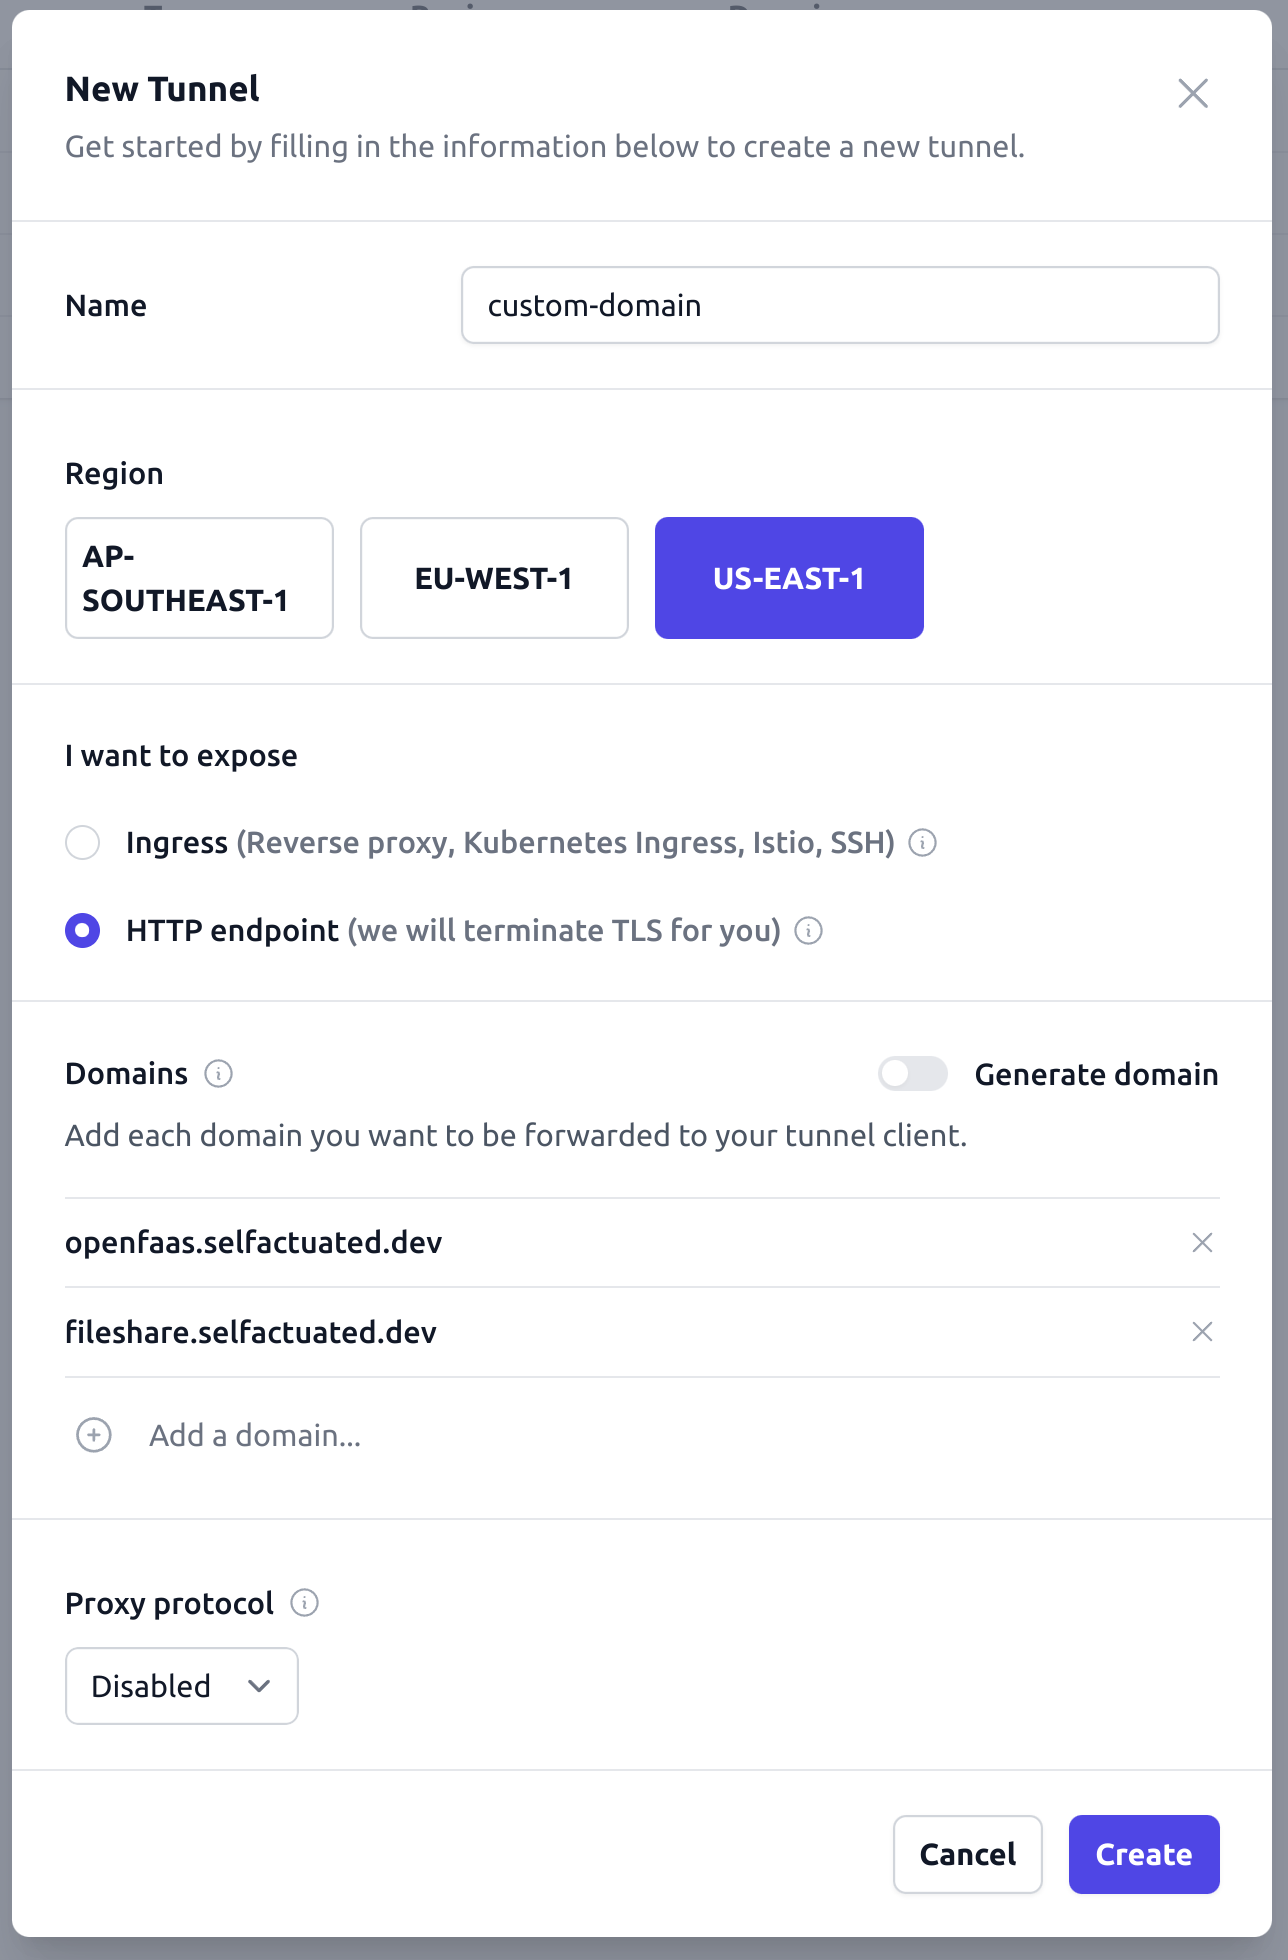
I’ve added both: openfaas.selfactuated.dev and fileshare.selfactuated.dev as an example.
If those services were both running on my machine on port 8080 and 8000 respectively, then I’d change the --upstream flags as follows:
--upstream openfaas.selfactuated.dev=http://127.0.0.1:8080 \
--upstream fileshare.selfactuated.dev=http://127.0.0.1:8000
Once again, you can then run the client on your machine and expose the services to the public Internet.
Run the CLI command for the client, and then you’ll then be able to access your service at https://grafana.exmaple.com or whatever name you chose.
3. HTTPS termination - bring your own domain
This final option is the most versatile, but is also more involved than the first two.
Instead of having inlets-cloud terminate TLS and obtain certificates for you, you will run your own Reverse proxy or Kubernetes Ingress Controller on your machine or cluster.
You’ll need to create a domain and verify it before moving forward. If you already have one verified, you can use it again for the new sub-domains you want to expose.
Create a tunnel and enter the sub-domains you want to expose, but this time pick “Ingress (Reverse proxy, Kubernetes Ingress, Istio, SSH)” as the type of tunnel.
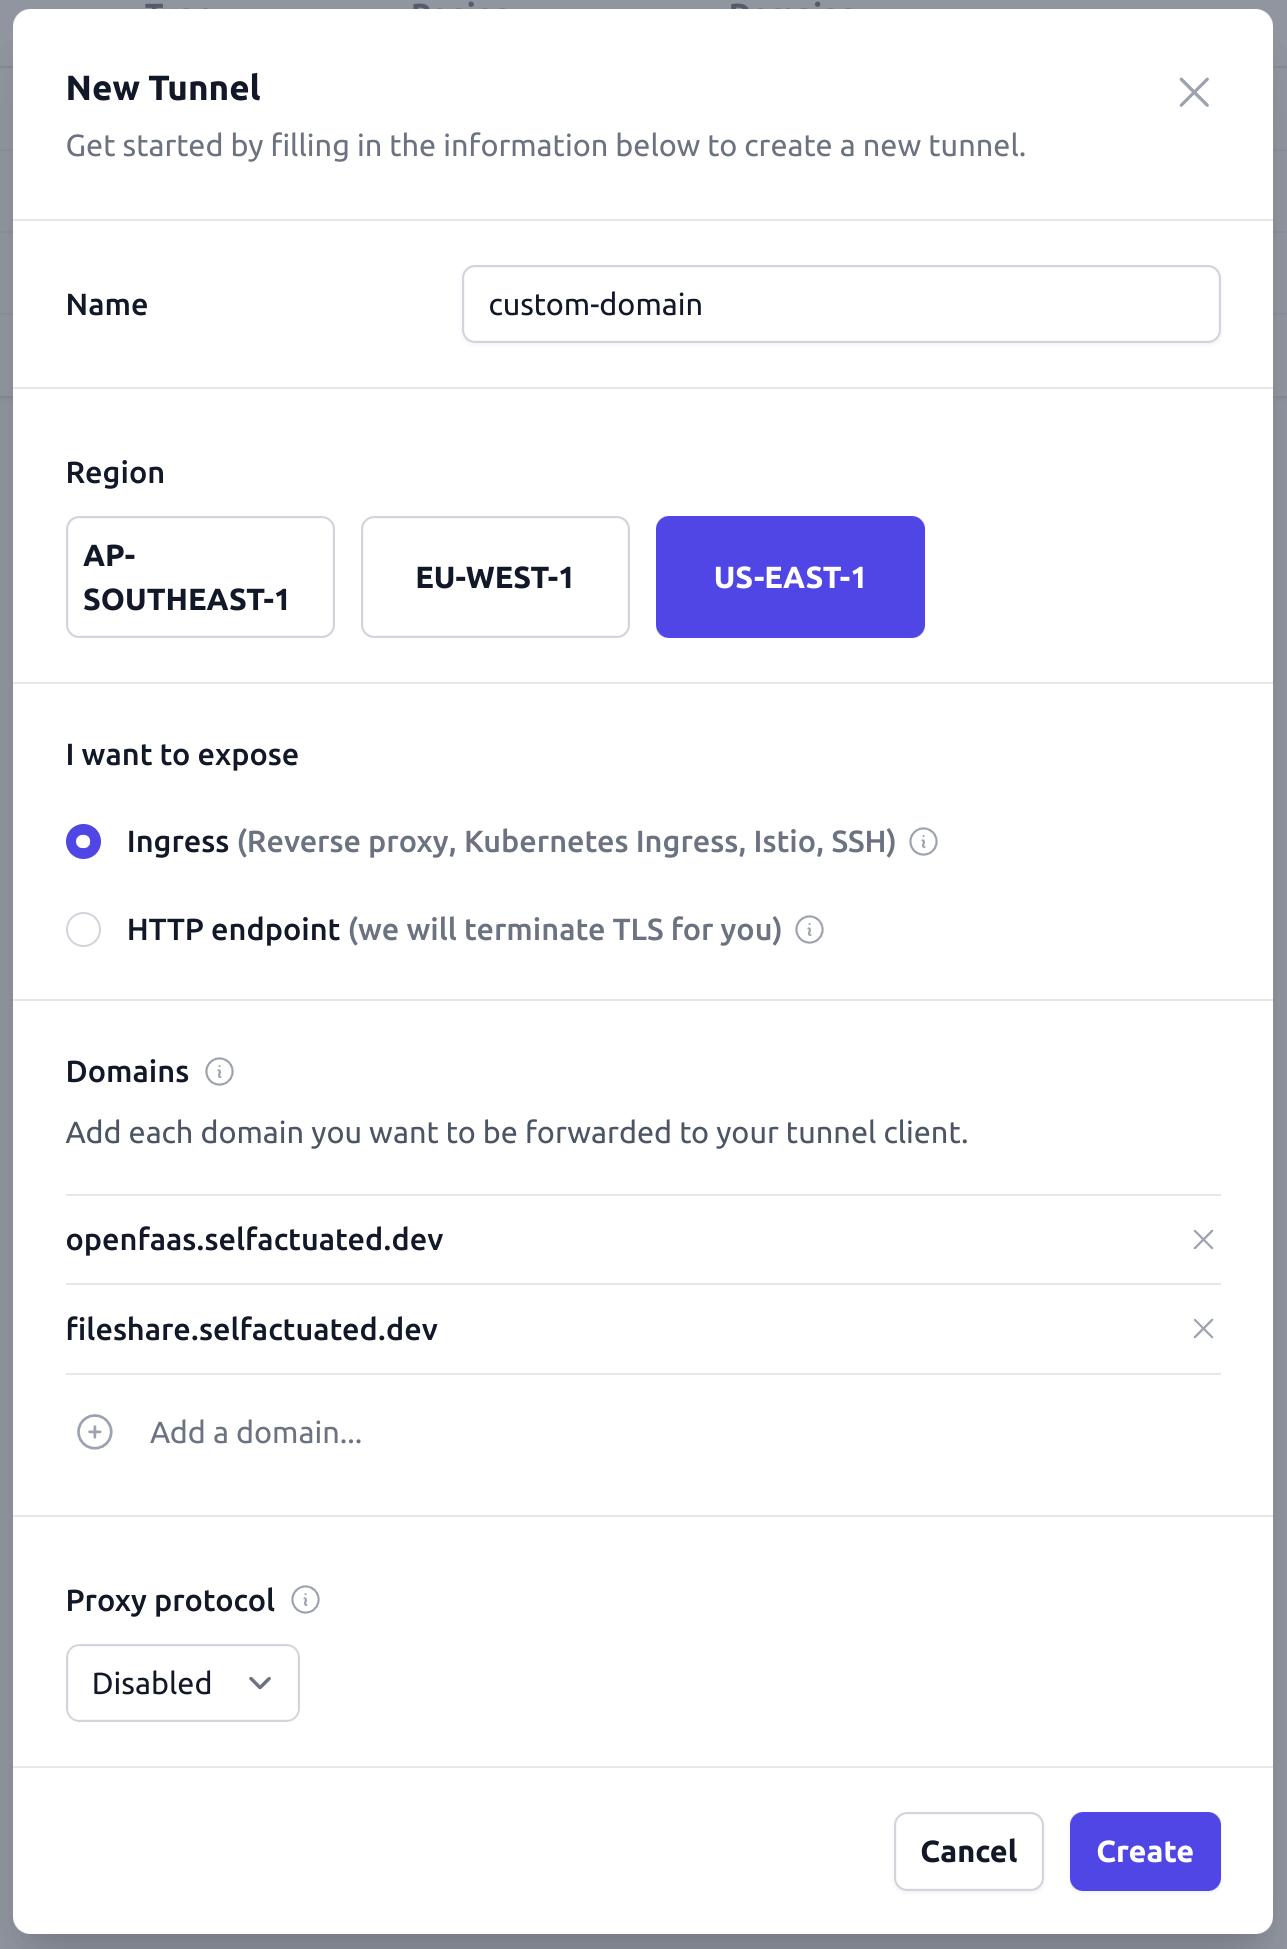
I’ve added both: openfaas.selfactuated.dev and fileshare.selfactuated.dev as an example.
Rather than having the --upstream flags point directly to the plaintext HTTP service, we have the --upstream pointing to our Reverse proxy or Ingress controller.
If you were exposing Caddy for instance, then you would then need to create a Caddyfile so it knows to answer the ACME challenges from Let’s Encrypt, and how to proxy the traffic to your local services.
openfaas.selfactuated.dev {
  reverse_proxy localhost:8080
}

fileshare.selfactuated.dev {
  reverse_proxy localhost:8000
}
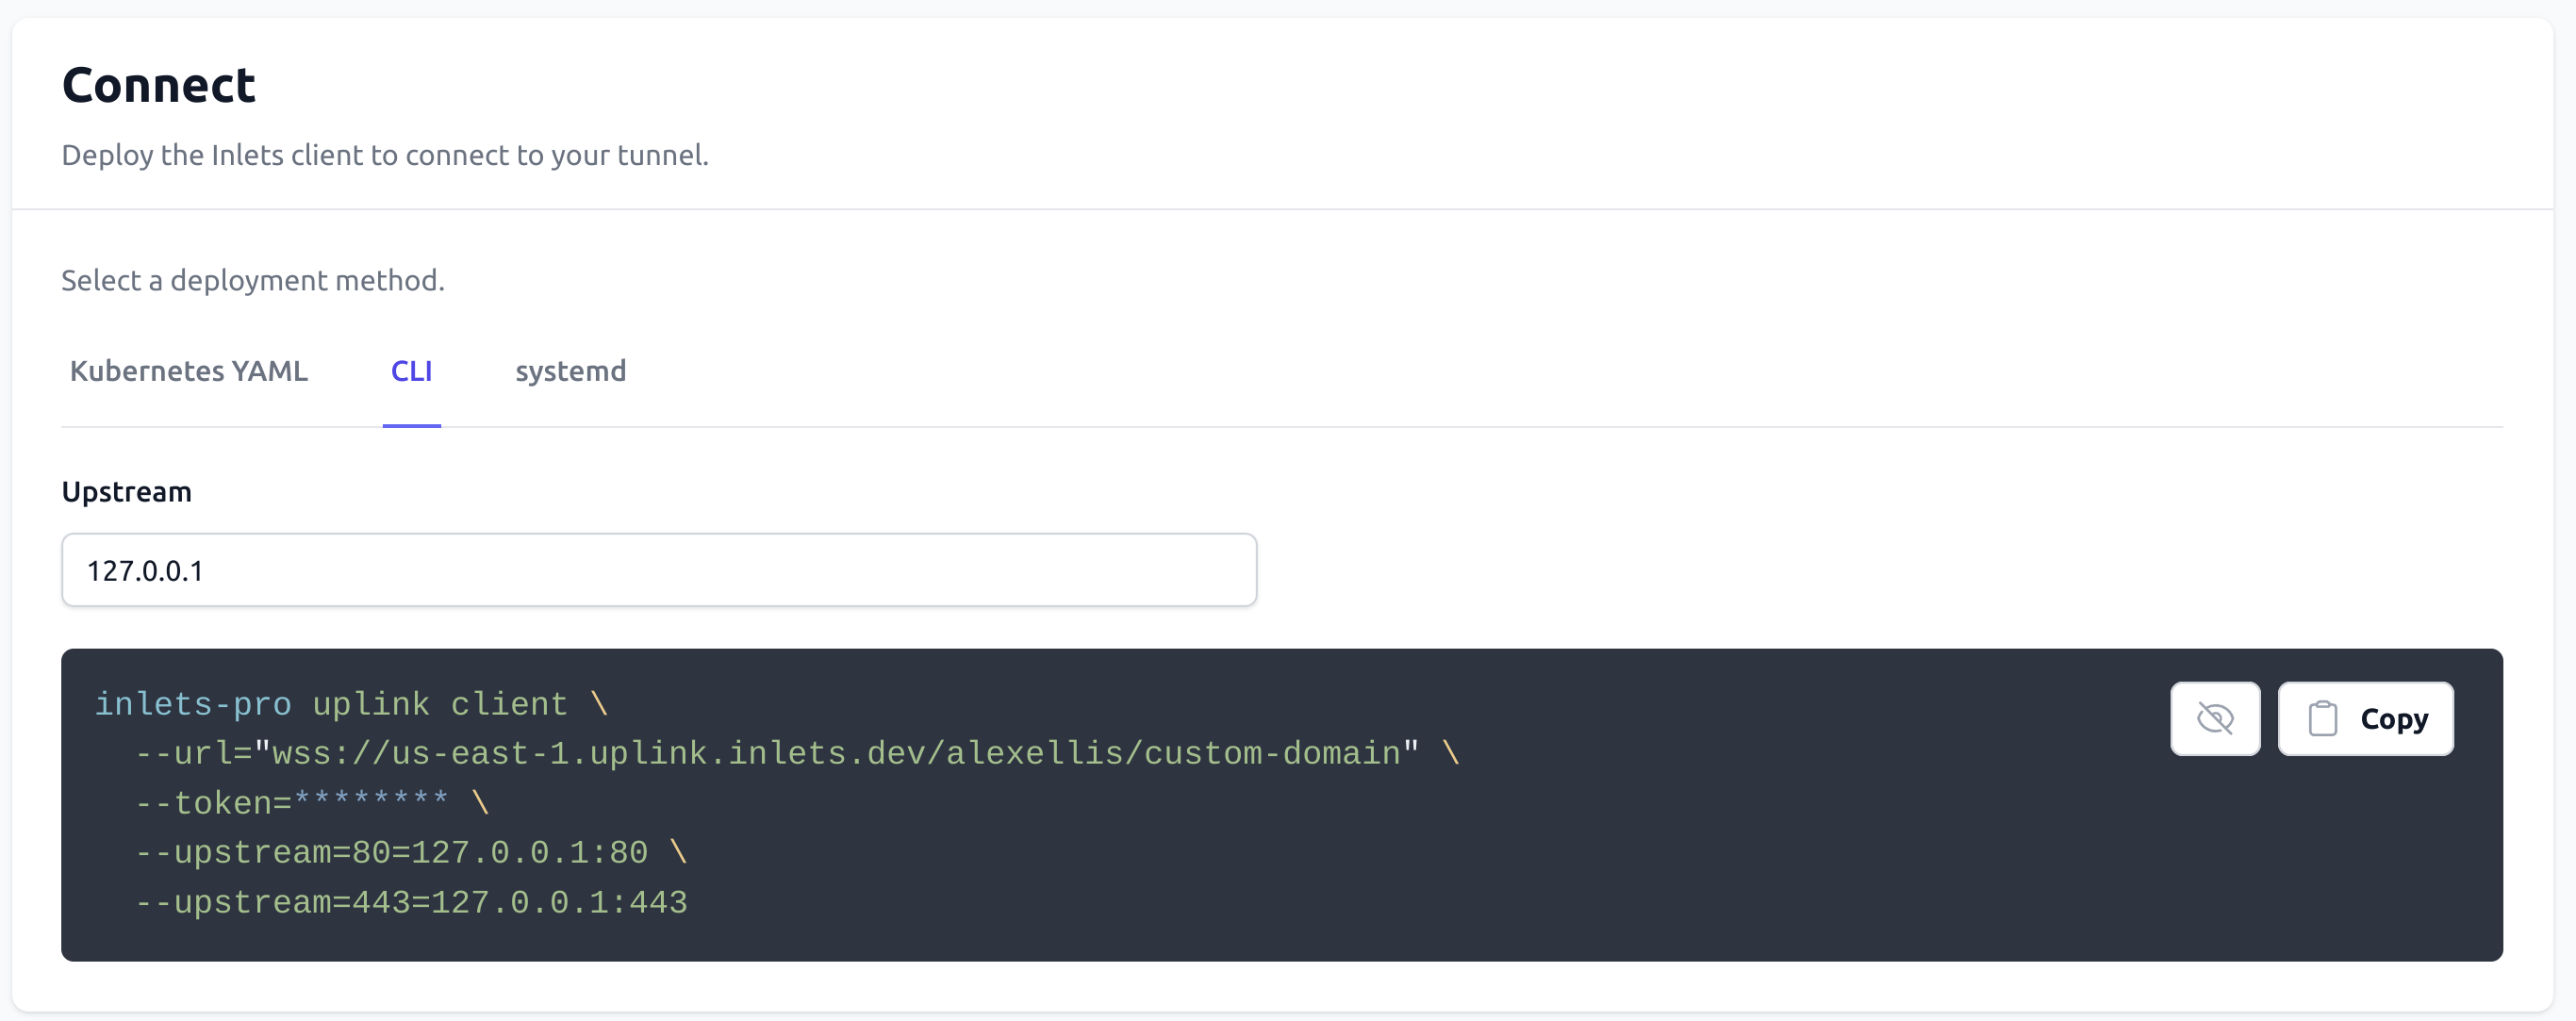
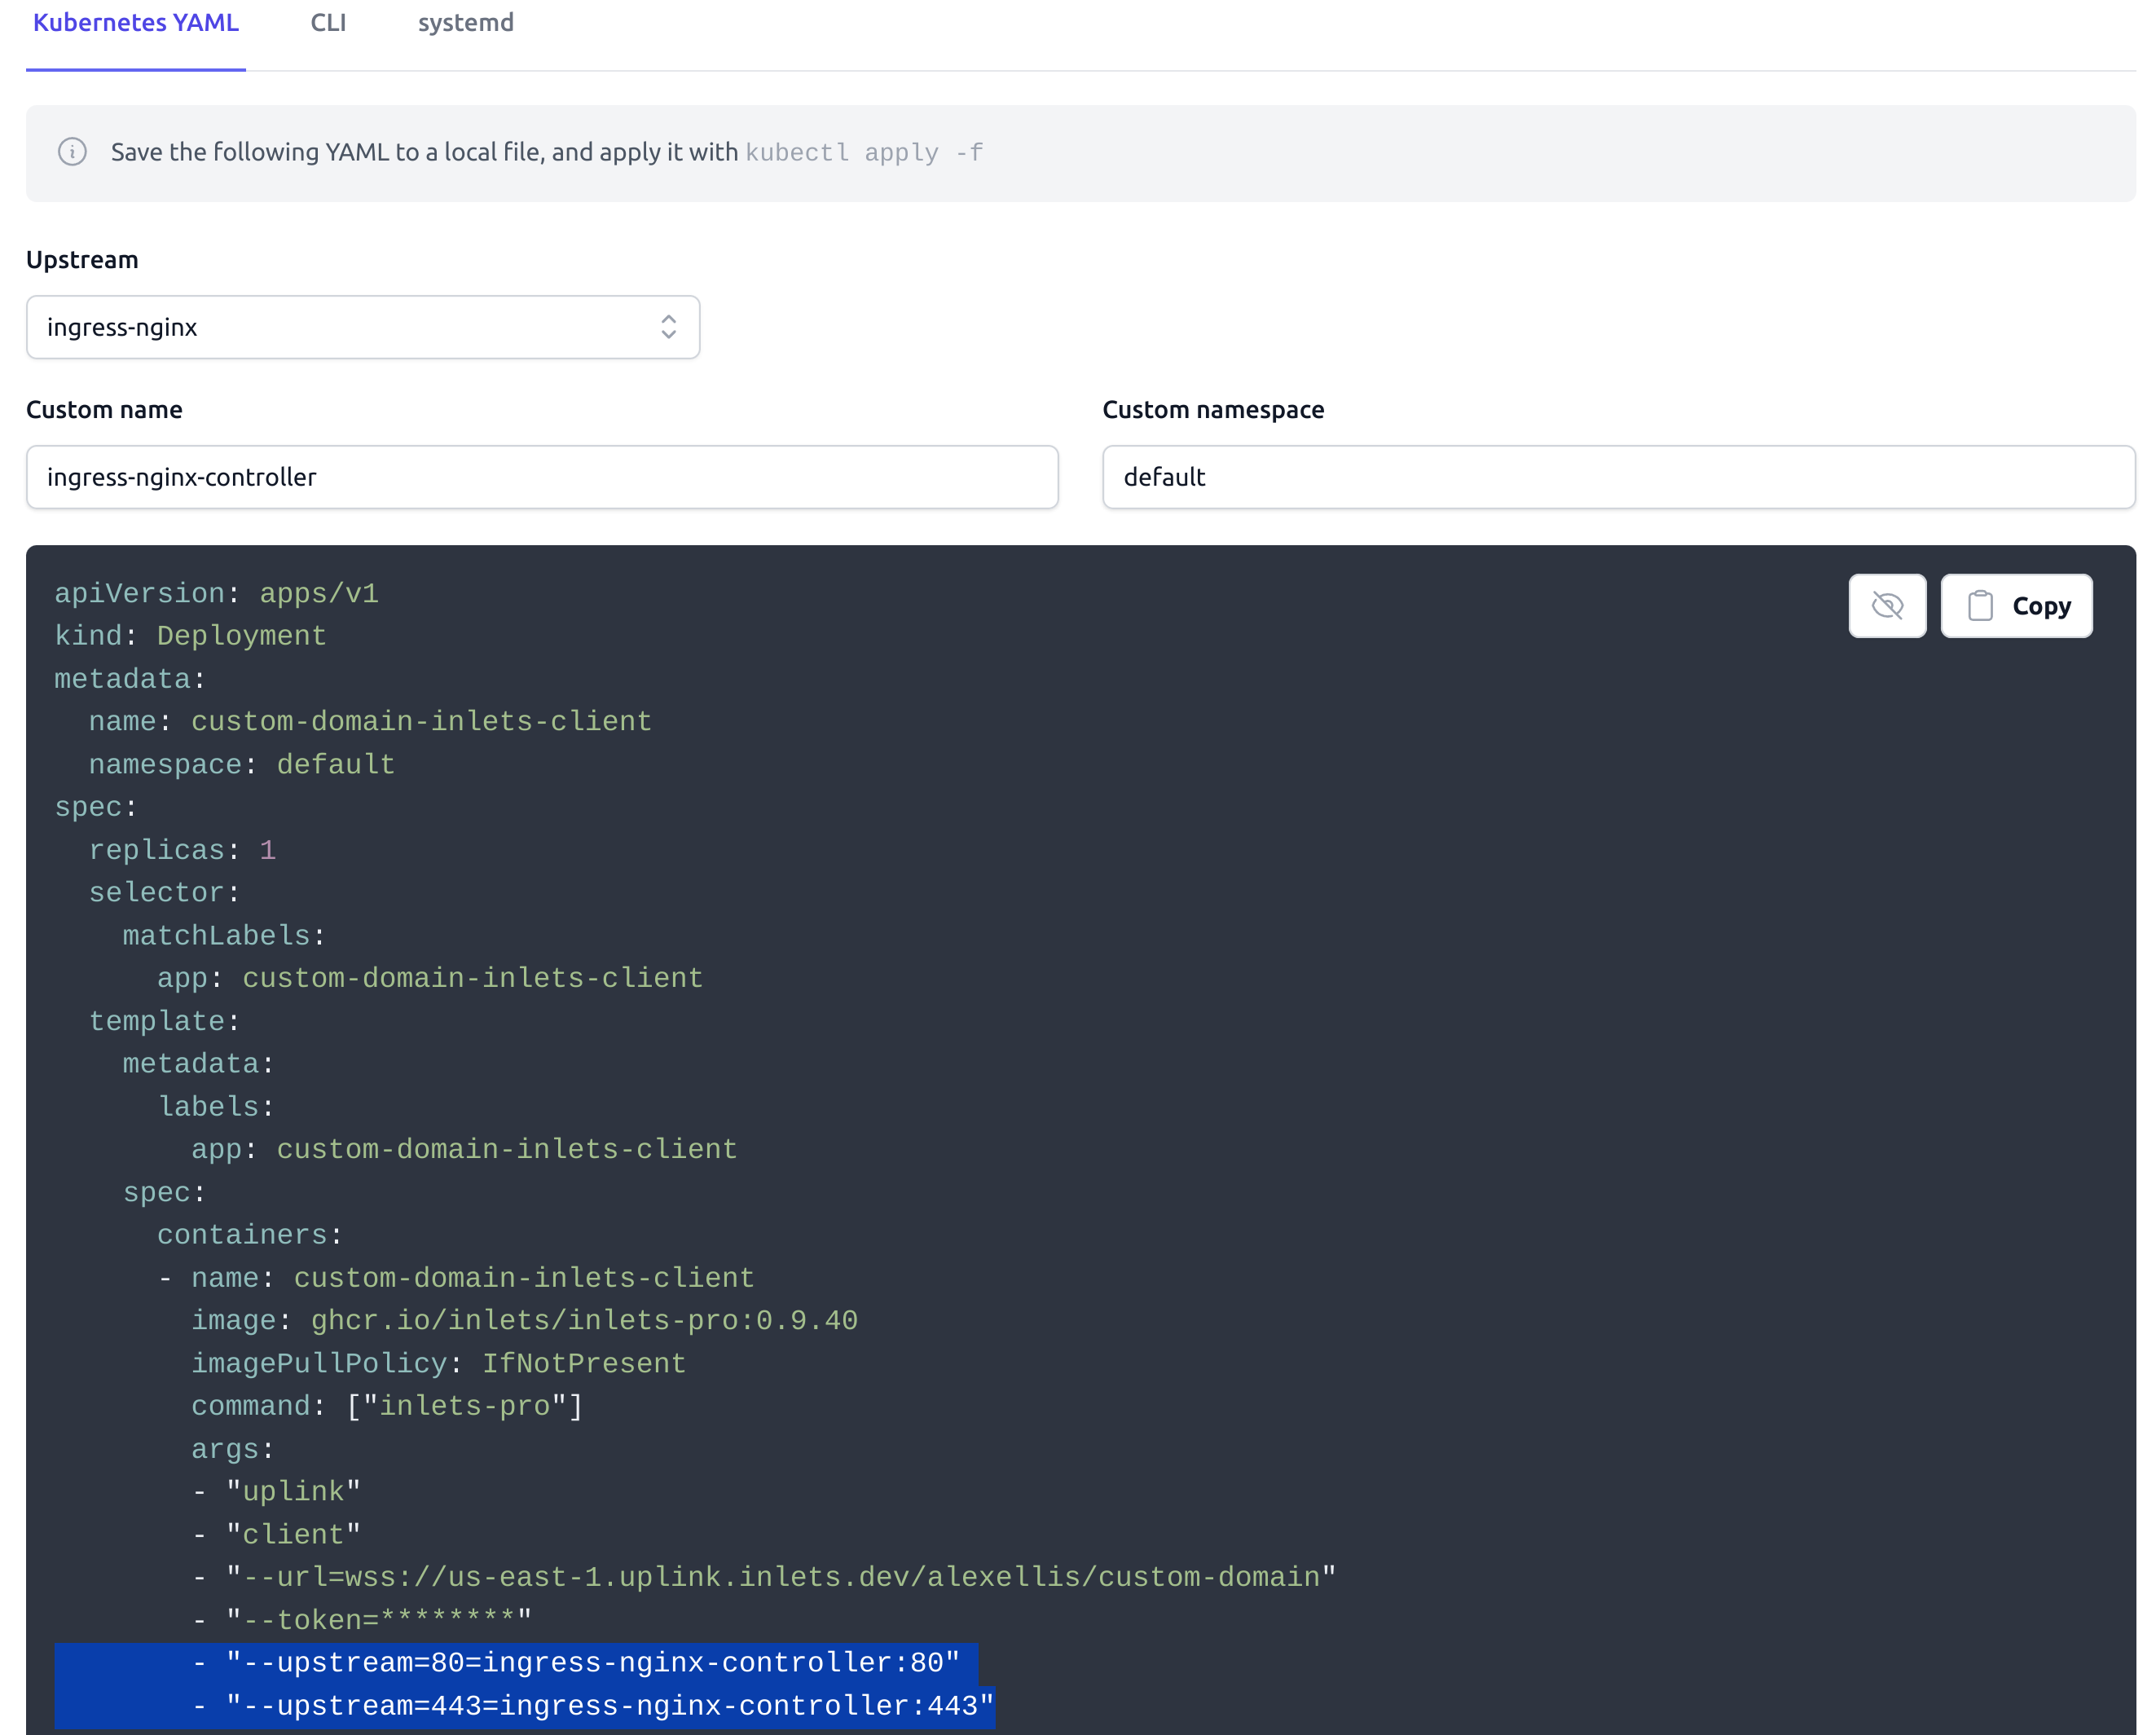
For Kubernetes, the process is very similar, but you use a Kubernetes Ingress resource for each of the sub-domains you want to expose, and have the tunnel point to the Ingress controller.
Wrapping up
In this post we looked at three options for exposing HTTP services to the public Internet with a single click. We used inlets cloud, which is a managed service that’s free to all inlets subscribers during beta.
- We started off with the one-click option, which is the easiest and requires the least configuration. That is instant, and gives you a HTTPS endpoint on our
try-inlets.devdomain. - The second option was to use your own custom domain, but still have inlets cloud terminate TLS for you. Just verify a domain and you’re good to go.
- The final option is the most flexible, and allows you to bring your own domain and run your own Reverse proxy or Ingress controller.
The tunnel client can be run directly on your machine with a CLI command, set up as a systemd service, or deployed to a Kubernetes cluster using a YAML file copied from the “Connect” section of the tunnel details.
You can register for access to inlets cloud. Just make sure you use the same email from your inlets subscription, and we’ll get you approved for access quickly.
If you have any questions don’t hesitate to reach out.
Inlets Cloud can also expose SSH and the Kubernetes API server
Inlets Cloud can also be used along with the inlets-pro snimux command to expose the SSH to as many local servers and Raspberry Pis as you like.
If you have a K3s cluster at home, or in your lab, you can tunnel out the Kubernetes API server so you can run kubectl from literally anywhere with an Internet connection.
Did you know? You can also self-host tunnel servers
Inlets Cloud is a very convenient way to set up tunnel servers instantly, with as little as one click, but for maximum flexibility and control, you can also self-host the tunnel server.
Subscribe for updates and new content from OpenFaaS Ltd.
By providing your email, you agree to receive marketing emails.